
 TL;DR:
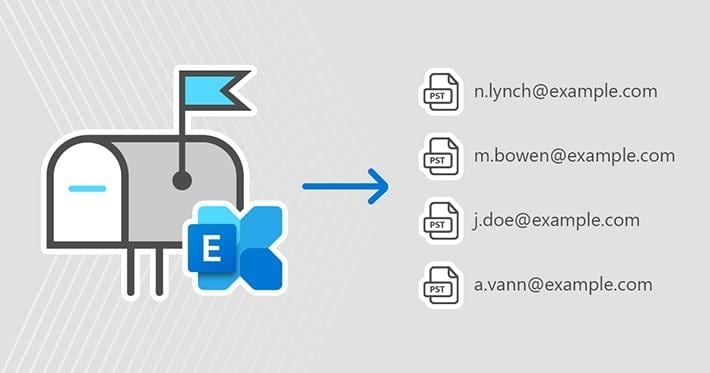
Exporting Microsoft Exchange mailboxes to PST can be accomplished manually via PowerShell or the Exchange Admin Center, though third-party automated tools like Stellar Converter for EDB provide a more efficient alternative for simultaneous bulk processing.
● Using PowerShell (for Exchange 2010, 2013, 2016, and 2019) requires creating a shared folder on the local C: drive and granting Read and Change permissions to the Exchange Trusted Subsystem before executing the New-MailboxExportRequest command.
● The Exchange Admin Center method supports Exchange versions 2007 through 2019 and requires users to manually specify a valid UNC path in the export wizard to define the file destination.
● Third-party converters bypass complex manual configurations to enable simultaneous extraction of entire EDB files, including public folders and attachments, while extending compatibility to legacy Exchange versions 5.5, 2000, and 2003.
Ask AI for a summary
 ChatGPT
 Perplexity
 Gemini
 Claude
 Grok
Grok
While you can manually export Exchange mailboxes to PST, it’s a highly complex process. In other words, you would require a large portion of tech-savvy to do the job successfully. If you’re a non-technical user, manual methods may not be the best.
In addition, manual methods often don’t involve access to advanced options that can be helpful for such processes. Finally, the manual process is way too time-consuming for you to bother with it and exposes you to technical glitches and human error.
However, if you are a tech geek, here’s how to export mailboxes from the Exchange Server to PST without breaking a sweat to ensure you never lose your precious email data.
Why You Should Export Exchange Mailboxes to PST
You may need to export your Exchange mailboxes to PST files for export needs, backing up the Exchange Server mailbox, or other business-related purposes.
For example, an employee has left your organization, and you need to store and archive the contents of their mailbox for compliance, security, and privacy purposes.
The reasons to do it are many to outline all here. However, here are the top three reasons to consider exporting the Exchange mailbox to PST.
- Get Content Into Mailboxes
The Microsoft Exchange mailbox has a finite mailbox storage limit that depends on your subscription plan. If you need more content in your mailbox, you can free up storage space by exporting your Exchange mailbox data to PST.
Aside from freeing space for more content, exporting will help you keep a neat mailbox and allow to import any files according to your needs. In addition, MS Exchange also limits the number of folders (including the number of items in each folder) you can keep in your mailbox.
If you need more space in your mailbox for incoming folders, export your folder data to PST to free up mailbox storage space.
- Compliance Requirements
Different compliance requirements, mandates, and regulations often require you to keep certain mailbox items or the entire data that might contribute to a pending legal case. So, export your mailbox from the Exchange Server to PST to securely store your files or save them for compliance.
- Create Mailbox Snapshots
When you need mailbox backup versions for privileged access, you can create mailbox snapshots and export them to PST format for safekeeping. Although you can consider backing up your entire Exchange database, you’ll soon find your efforts ineffective and prone to mistakes. Instead of wasting time and effort, creating snapshots is much easier and more effective.
Method 1: Export Exchange Mailboxes to PST Using Powershell
To export your Exchange mailbox to PST using the Powershell Command on Exchange Server 2010, 2013, 2016, or 2019, follow these steps:
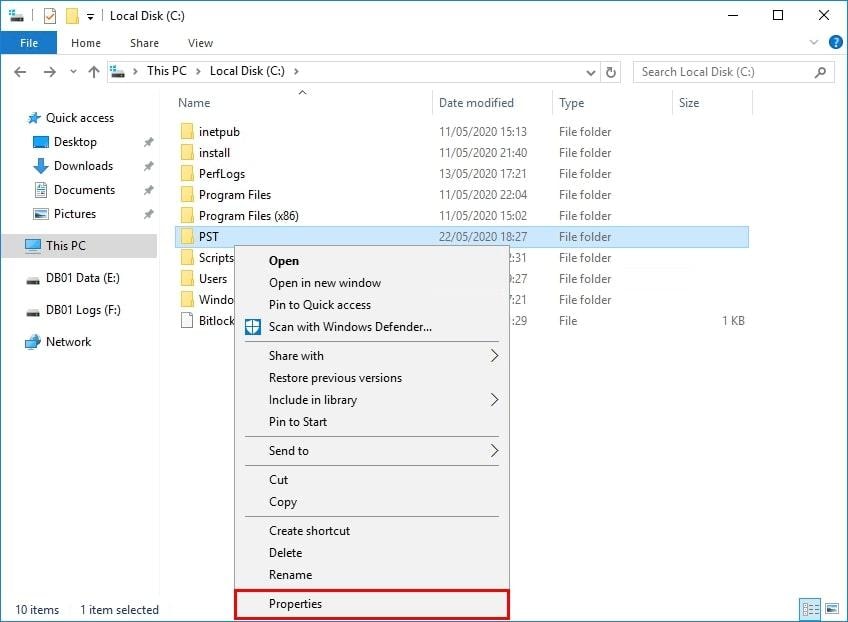
Step1 Create your PST folder in the C: drive
Create a PST folder in your local C: drive to save the exported mailbox data. Right-click the folder, select Properties.
Then, choose the Sharing option in the Properties tab, and click Advanced Sharing.
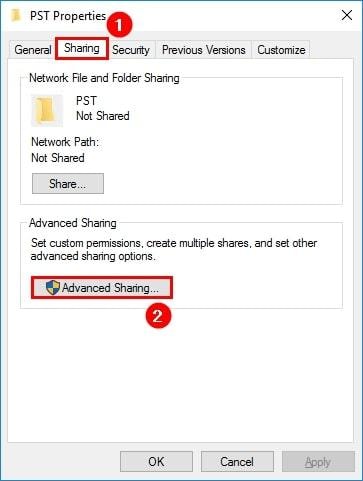
Tick the Share this folder box and open the Permissions tab.

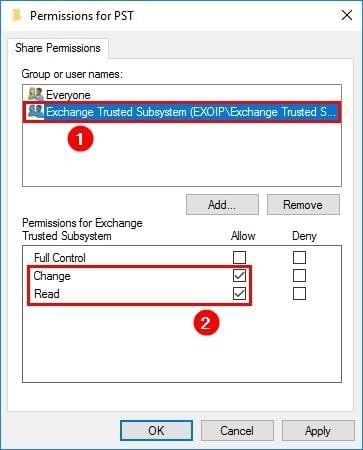
Step2 Add the necessary permissions
Select the Exchange Trusted Subsystem option in the Share Permissions tab and tick the Change and Read boxes.
Step3 Export your Exchange mailbox to PST
The next step is to export your mailbox to PST in Exchange. Create a mailbox export request to list all the mailboxes in your company. You can list only your mailbox if you know the name.
Use this code to list your mailboxes:
Get-Mailbox -ResultSize Unlimited
Run the following line of code using the Alias parameter behind the - Mailbox to export to PST:
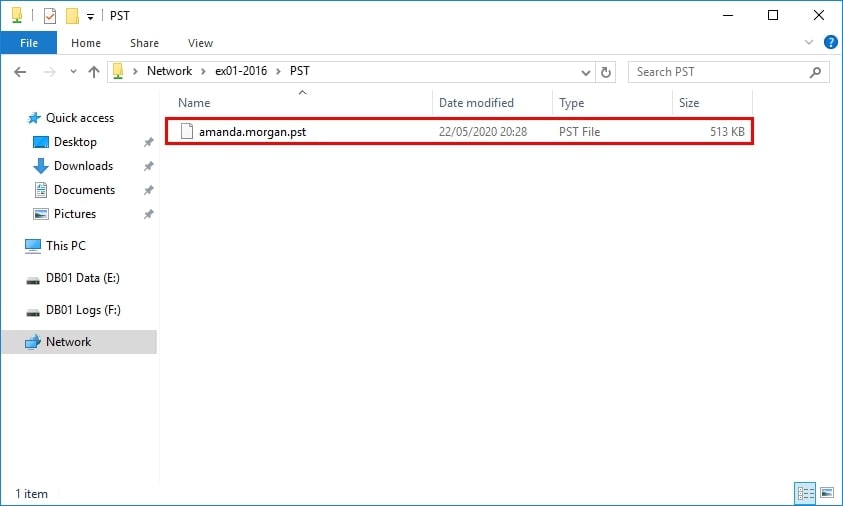
New-MailboxExportRequest -Mailbox ”amanda.morgan” -FilePath “\\ex01-2016\pst\amanda.morgan.pst”
Execute this command to bulk-export the Exchange mailbox to PST:
foreach ($Mailbox in (Get-Mailbox -ResultSize Unlimited)) {New-MailboxExportRequest -Mailbox $Mailbox.DisplayName -FilePath “\\ex01-2016\PST\$($Mailbox.Alias).pst”}
That’s it; the export process should be complete.
Method 2: Export Exchange Mailboxes to PST With the Exchange Admin Center
Here’s how to export mailboxes from the Exchange Server to PST with the Exchange Admin Center (EAC). This method is applicable to all versions of Exchange from 2007 to 2019. Whether you are using Exchange 2007, 2010, 2013, 2016, or 2019, this method can help you finish the export process.
Step1 Run EAC and start the Export to a .pst file wizard
Run EAC and follow this path: Recipients > Mailboxes > More options > Export to a PST file. That will start the Export to a .pst file wizard.
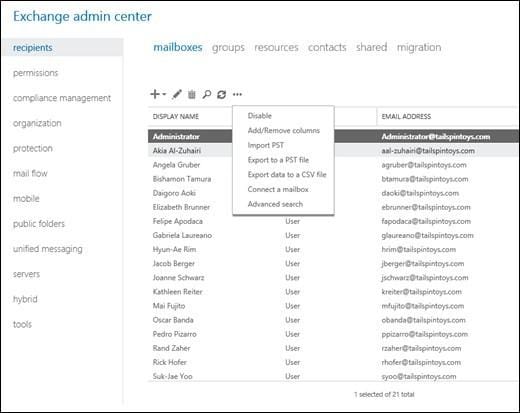
Step2 Select the source mailbox
In the export wizard, select your mailbox and choose what you want to do with it by selecting one of these options: Export only the contents of this mailbox or Export only the contents of this mailbox’s archive. Click Next to confirm your action.

Step3 Specify the file name and enter the UNC path
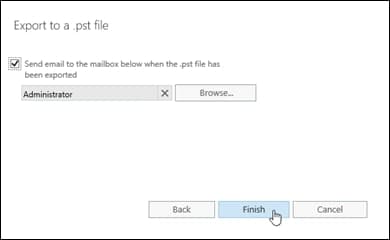
Specify the path to export your .pst file by entering the UNC path and clicking Next.

Step4 Complete the process
Tick the box saying Send email to the mailbox below when the .pst file has been exported and hit Finish to finalize the export.
Method 3: Export Exchange Mailboxes to PST Using Third-Party Automated Tools
Since exporting mailboxes from the Exchange Server to PST takes forever, you can speed things up significantly using a third-party automated tool. Stellar Converter for EDB is one example, allowing you to convert EDB files to PST to export multiple Exchange mailboxes to PST simultaneously.
In addition, the tool enables you to export all mailbox items to PST files, including public folders, journals, tasks, emails, notes, calendars, contacts, and attachments. It is compatible with Exchange versions 5.5, 2000, 2003, 2007, 2010, 2013, 2016, and 2019. Here’s how to use this Exchange Server EDB to PST converter.
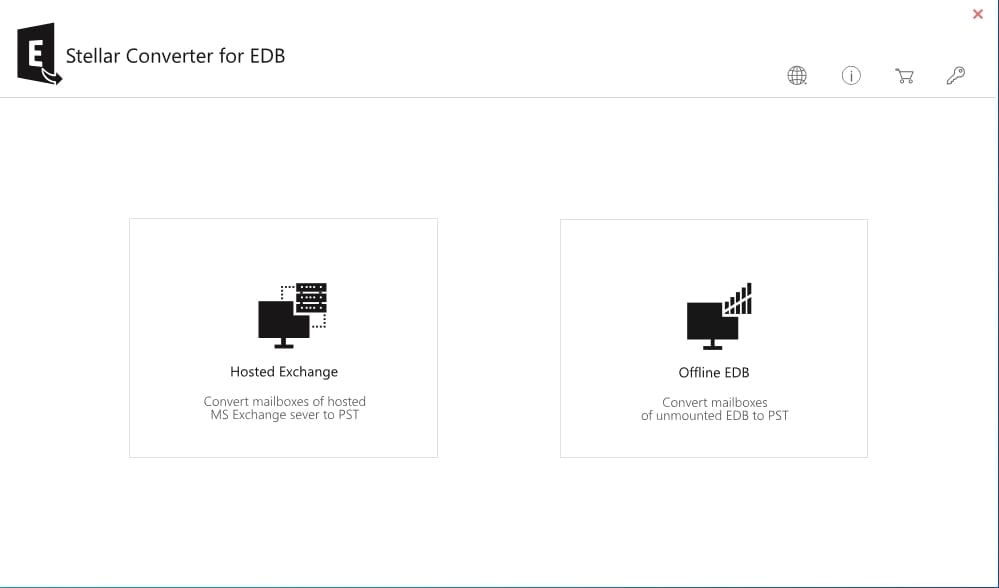
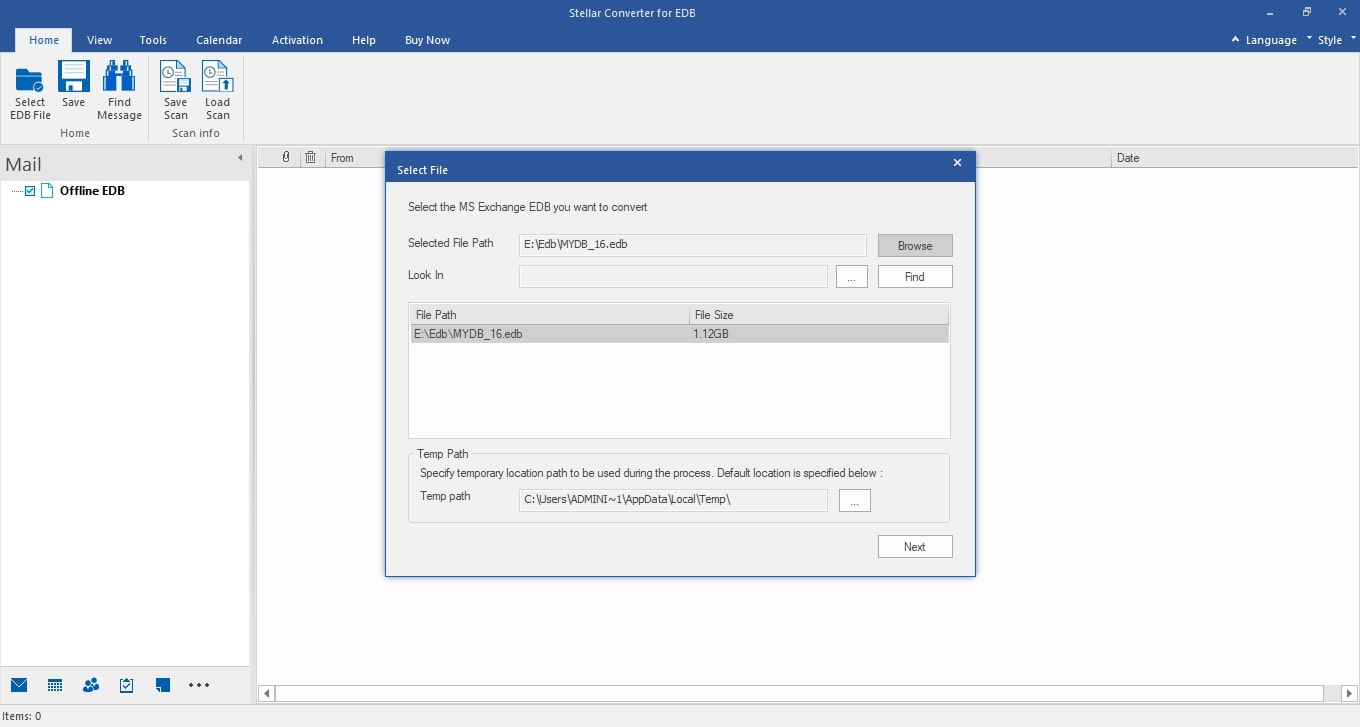
Step1 Run Stellar Converter for EDB
Run Stellar Converter and choose from the two options in the main menu: Hosted Exchange or Offline EDB. Select the option you need and click Browse.
Step2 Select your EDB files
Click Find to search for your EDB files. Select the files you want to convert to PST and click Next.
The Stellar Converter tool will preview all mailboxes in the EDB file.
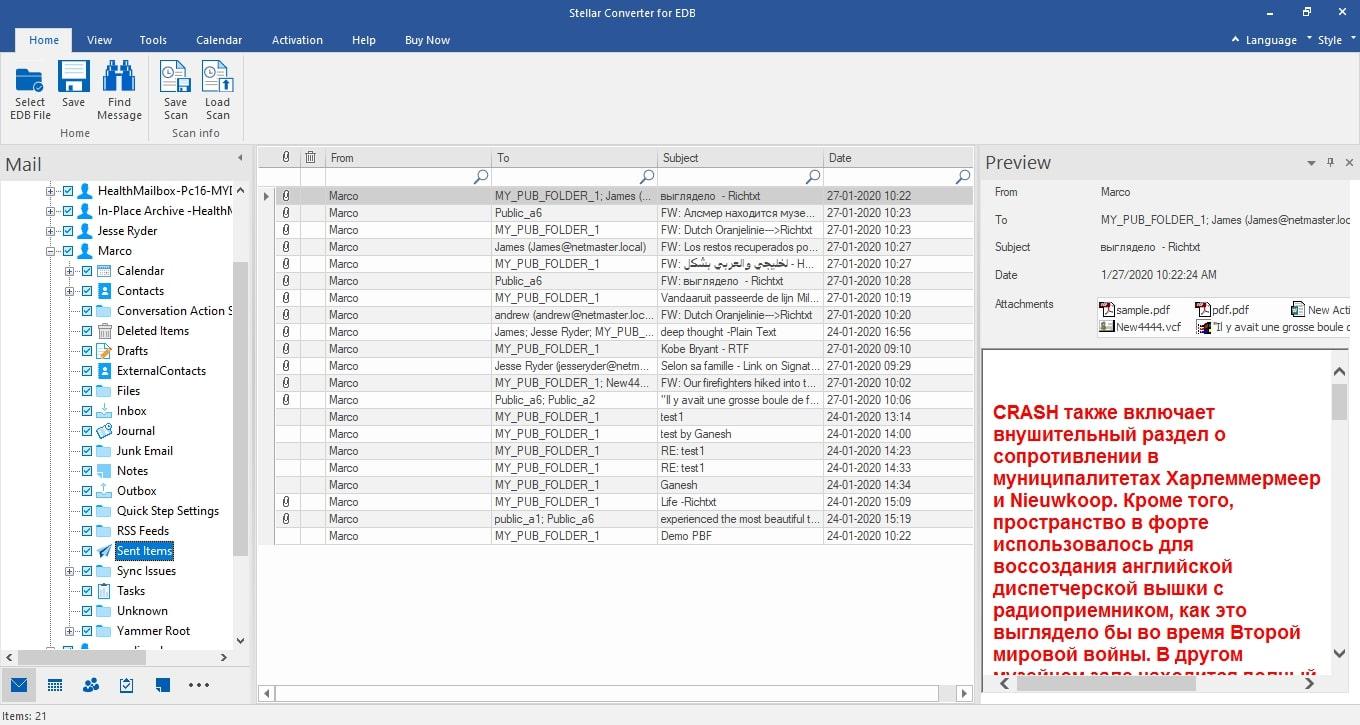
Step3 Export your mailbox to PST
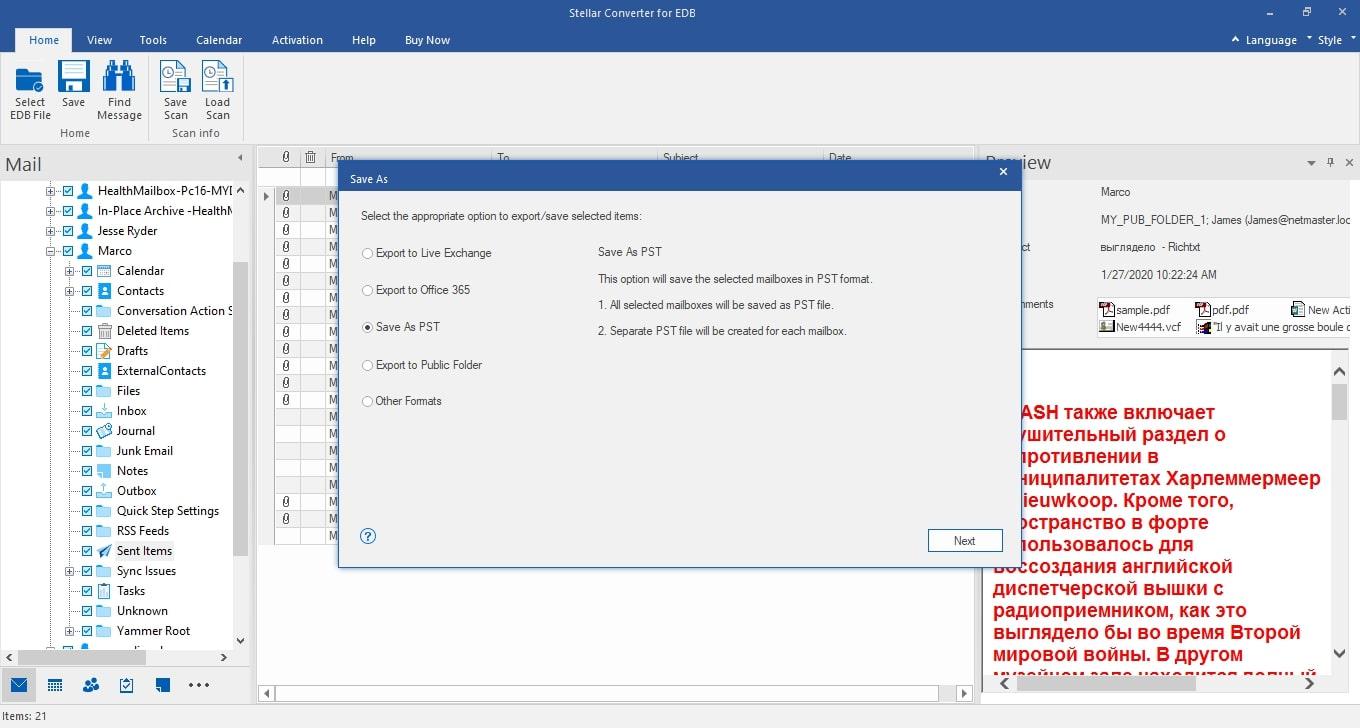
Select the mailbox folder you want to export, go to the File tab, and select Save. That will export your mailbox files in PST format.
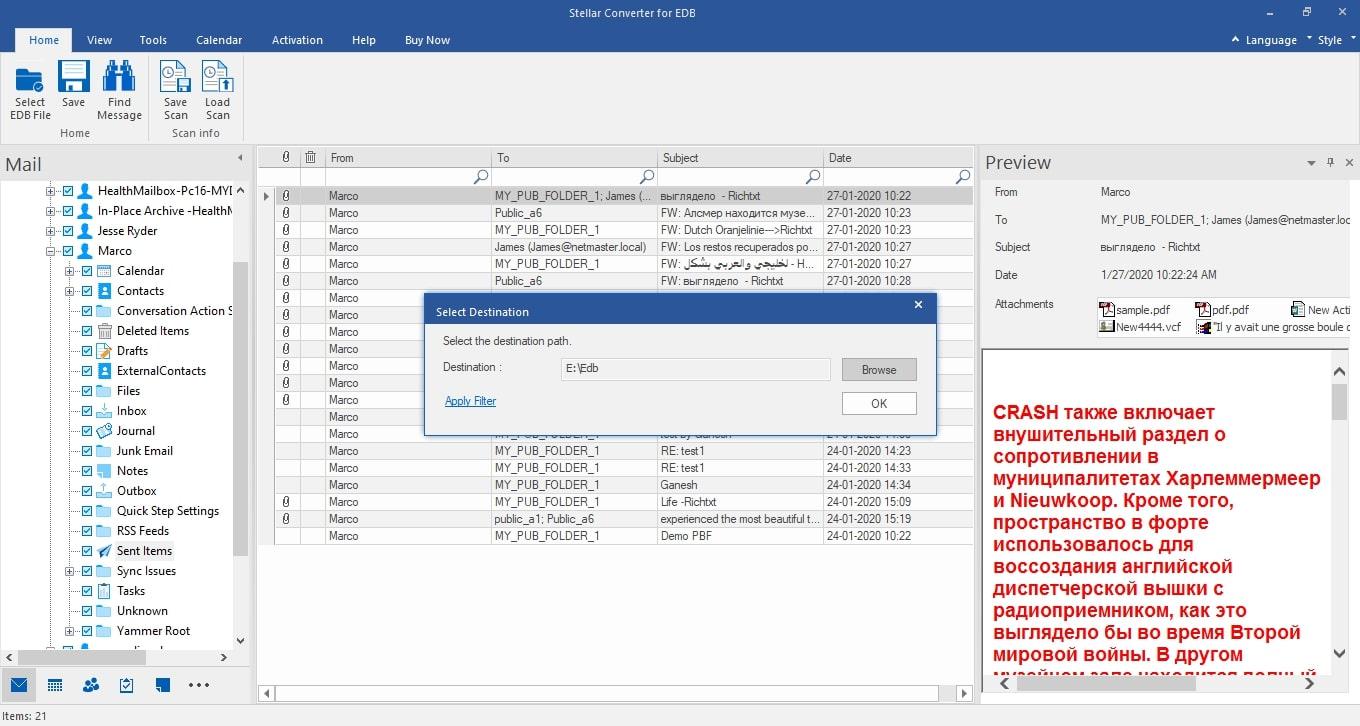
Specify where you want to save your PST file and click Next. The Stellar Converter tool will save your PST file in a defined destination.
Conclusion
This guide has shown you how to export the Exchange mailbox to PST using several methods. Although you can do it manually, it’s better to use the power of automation to save time and effort and keep your mailbox files secure for safekeeping.
Exporting mailbox files to PST is one of the best ways to create multiple data backups. You can also use your exported files to import a new mailbox to another Outlook account. Instead of wasting time on bulk-exporting multiple mailboxes, use modern technology to complete the process error-free.


