
Modern computers store large amounts of valuable data. People often forget how many images, videos, documents, and other files they have on their drives until they move this data elsewhere. For most, it comes down to that moment when they’re buying a new computer or replacing their HDD.
At that moment, they have no idea of the best course of action and moving all data. That’s where HDD cloning comes into play. With this option, you create a 1-to-1 copy of your HDD and move to an SSD with all your data and system files.
Today we’ll talk about how you can use Clonezilla for cloning an HDD to SDD and introduce a potentially better alternative.
Why Use Clonezilla to Clone HDD to SSD
Clonezilla lets you clone your whole drive to another without missing a single piece of data. When using it on Windows, you can migrate the current systems, including all files, apps, settings, and systems files, to a new SSD drive without having to transfer everything manually or install a new operating system.
If you upgrade your drive and swap it for a faster SSD, this makes the process simple. On the other hand, if you’re buying a new computer, you can use this to continue where you left off.
SSDs are faster – they can transfer your data more quickly and start programs. In fact, your operating system also benefits from quicker storage. Your device will start more quickly, updates and program installations will go faster, etc.
The Issue When Using Clonezilla to Clone HDD to SSD
Even though Clonezilla is generally a good disk cloning tool, it has a couple of shortcomings that can be really stressful for some users. First of all, it’s open-source, and even though this offers several advantages, there are some issues as well.
- No User Support
For example, there are no dedicated updates and patches that fix issues. Even worse, if you have a problem, you can’t contact the vendor and ask for help – you must rely on the online community to get the necessary information.
- Complicated Clong Process
Another major problem with Clonezilla is its complex interface. There’s no typical graphical user interface – you must boot the program like a flash drive. However, you will also have to go through a complex setup process before using it.
How to Clone HDD to SSD With Clonezilla
Before using Clonezilla, you must create a bootable SSD and download the Clonezilla file on the SSD. This means extracting Clonezilla zip and creating a new partition on your SSD where you can put the tool. As an alternative, you can create a bootable USB with Clonezilla.
Once you’ve done that, here’s how you can clone HDD to SSD with this tool:
- Step 1: Start your computer and boot from media with Clonezilla installed.
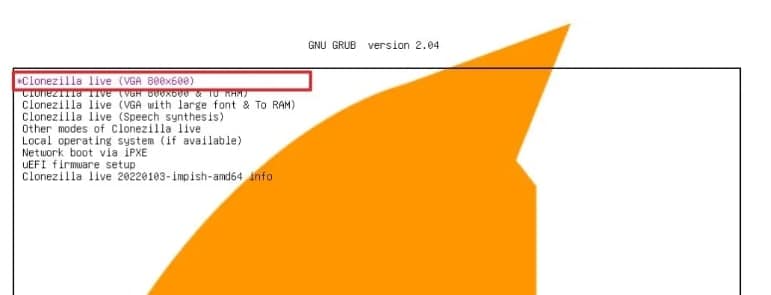
- Step 2: Select Clonezilla Live and press enter.
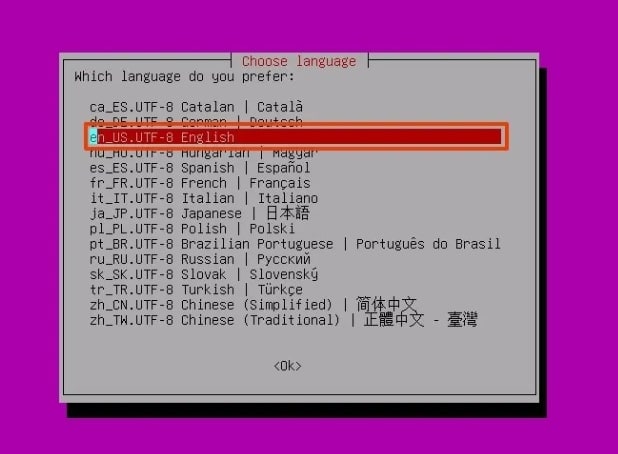
- Step 3: Select your desired language and press enter.
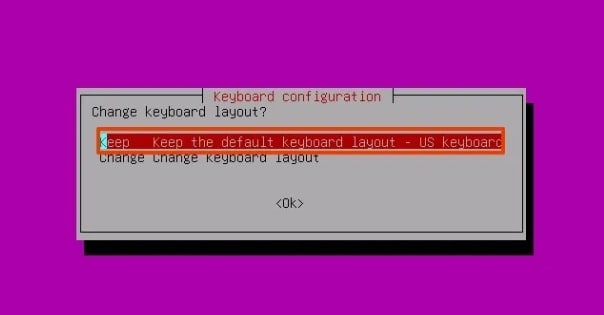
- Step 4: Select the default keyboard layout and press enter.
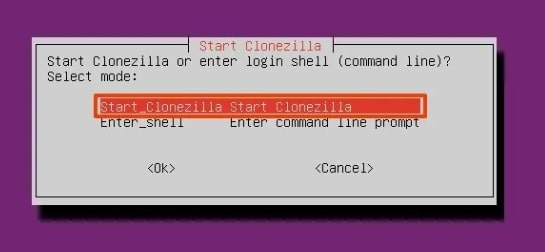
- Step 5: Select Start Clonezilla on the next page and press enter.
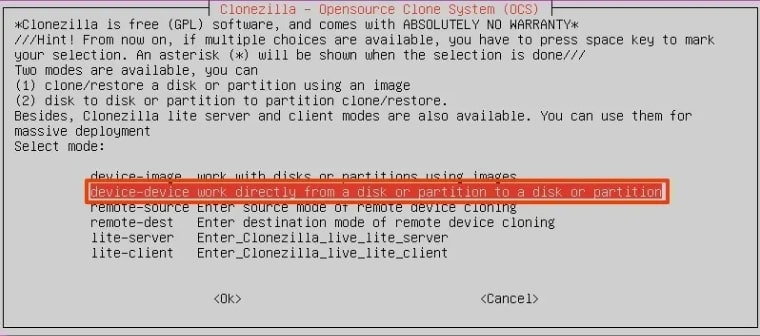
- Step 6: Select the “device-device work directly from a disk or partition to a disk or partition” option and press enter.
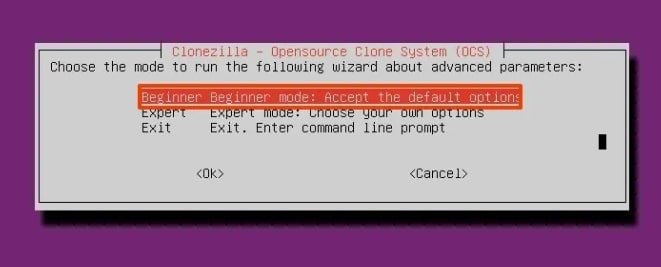
- Step 7: Select “Beginner mode: Accept the default option” and press enter.
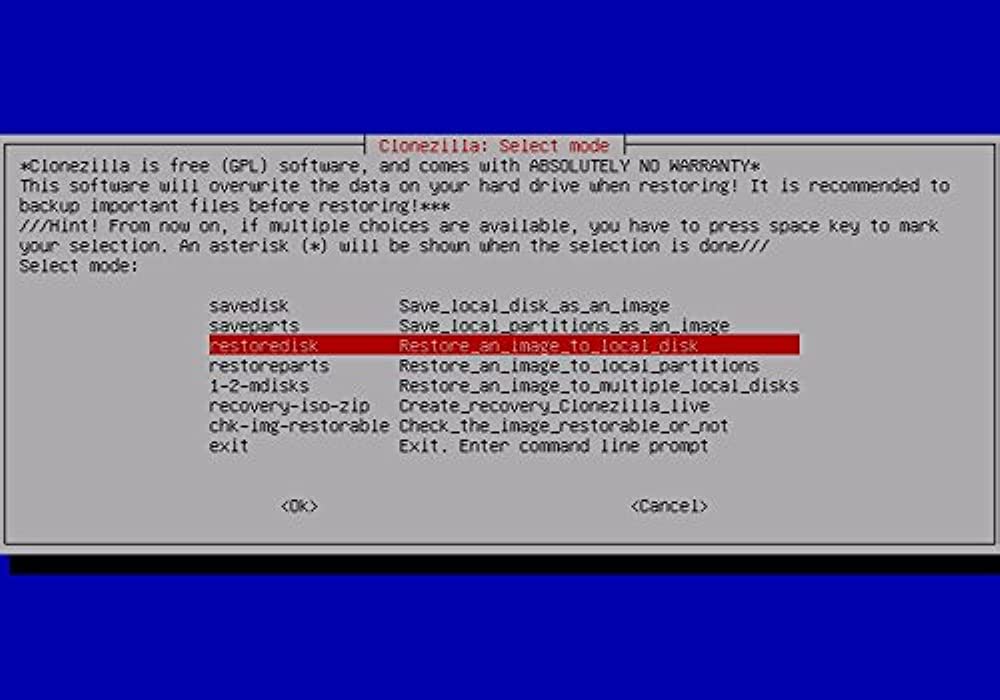
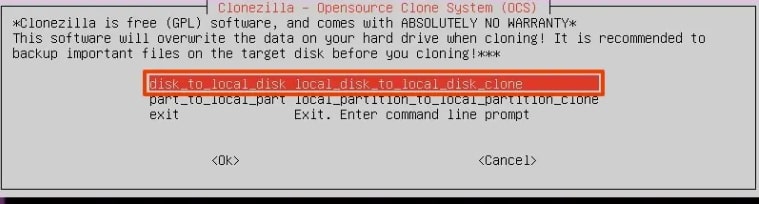
- Step 8: Select “disk to local disk local disk to local disk clone” and press enter.
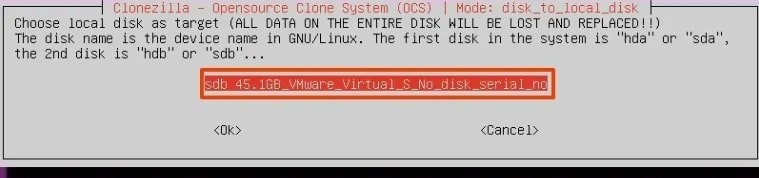
- Step 9: Select the HDD you want to clone and press enter.

- Step 10: Select the SSD you want to clone to and press enter.
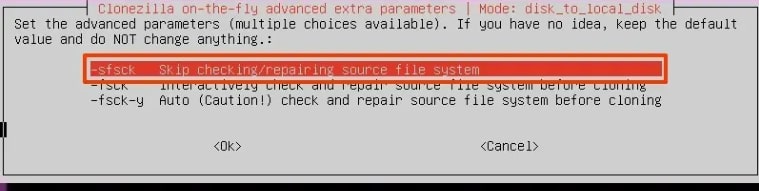
- Step 11: Select “-sfsck” and press enter.
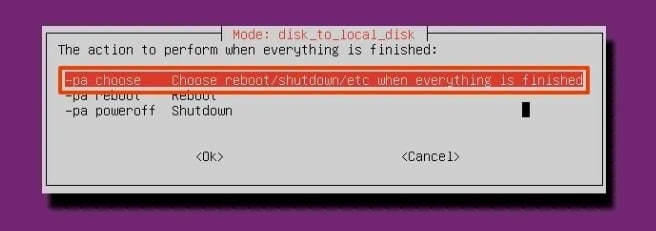
- Step 12: Select the action you want to perform in the next menu after completing the process. Press enter to continue.
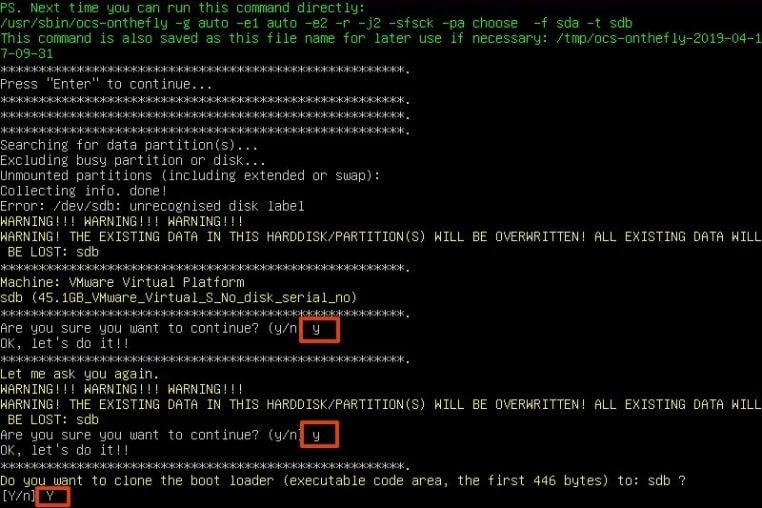
- Step 13: Confirm all the prompts by pressing y and enter, and wait until the process is complete.
Looking for a Better Alternative to Clonezilla Clone Disk Features
As you can see, Clonezilla is a bit outdated and complicated. Not only are there many steps you need to go through before you can actually start the cloning process, but the whole environment resembles DOS programs without a graphic interface.
If you’re not tech-savvy or used to creating bootable disks or accessing media through BIOS, looking for a simpler alternative is probably a good idea. Wondershare UBackit is a tool you should consider because it’s really simple to use, and you can’t make any mistakes.
Wondershare UBackit - Your Reliable Disk Cloning Software
Disk Clone: You can clone hard drive to SSD or another HDD easily. It supports a wide range of disk types, such as HDDs from all brands, SATA/M.2 SSDs, NVMe SSDs, USB drives, NAS drives, and SD cards.
Partition Clone: Instead of cloning the entire disk, you have the option to clone a particular partition.
Sector-by-Sector Clone: You are allowed to replicate a hard drive or partition bit by bit.
Supported OS: It is compatible with Windows 11/10/8.1/8/7, 32 bit and 64 bit.
Wondershare UBackit can clone system and data disks to any type of SSD drive and individual clone partitions. However, it’s much more than just a cloning tool – you can use it to schedule automatic and incremental backups so you don’t lose valuable data.
At the same time, this cloning software is very successful at cloning drives. You don’t have to set anything up or boot drives. Download the Wondershare UBackit, install it, and connect your SSD to start the process. Here’s how to do it:
How To Clone HDD to SSD Using the Clonezilla Alternative
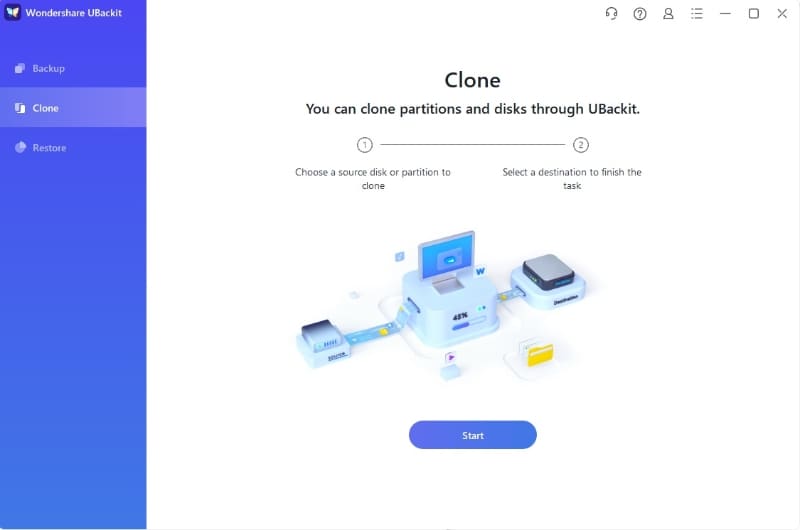
- Step 1: Launch Wondershare UBackit, and once it starts, click the Clone option on the left side.
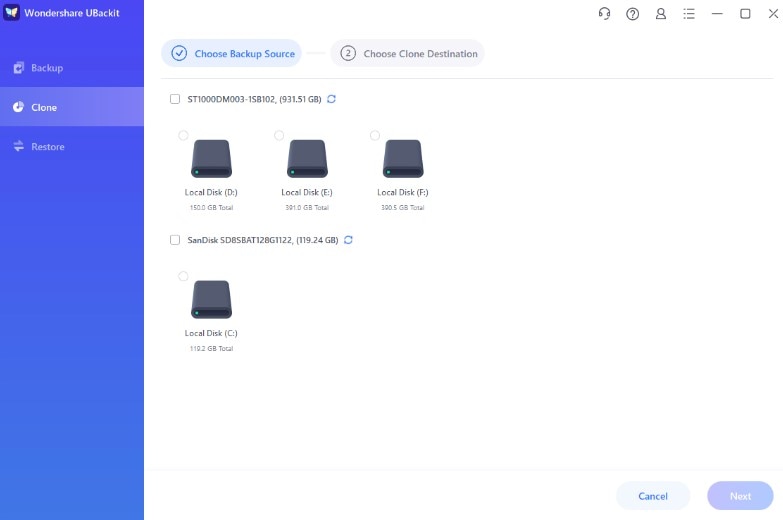
- Step 2: Select the HDD you want to clone.
- Step 3: Select the SSD You’ve previously connected as the clone destination.
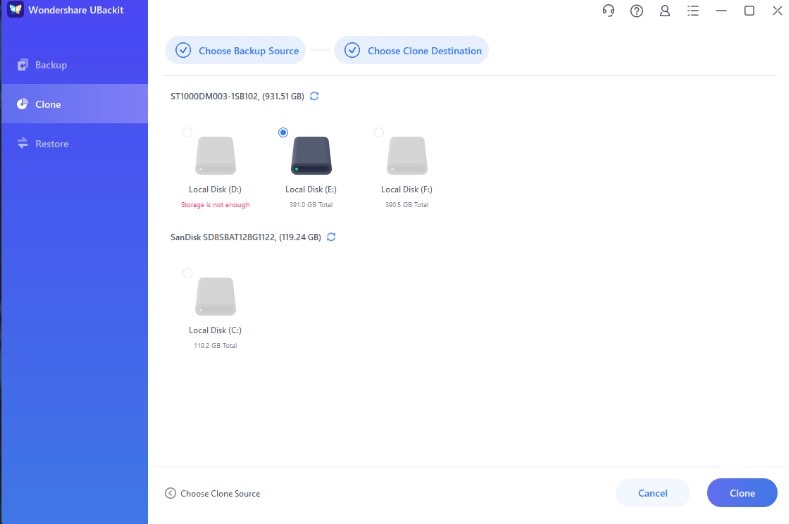
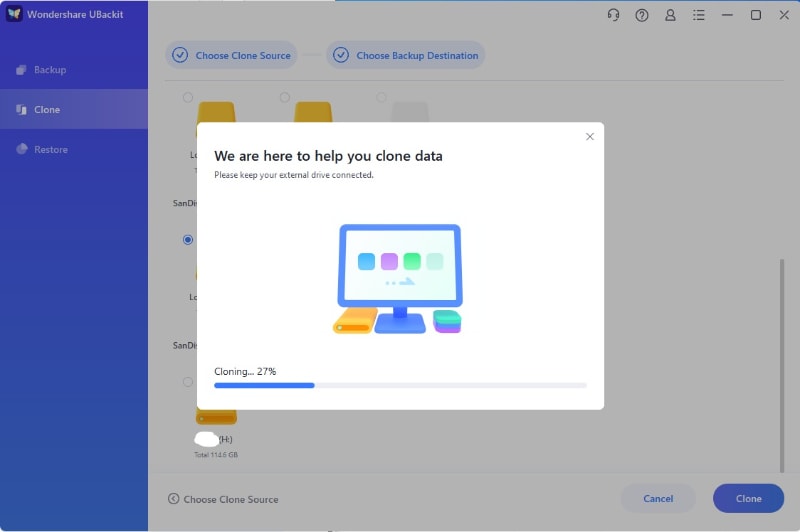
- Step 4: Click Clone in the bottom right corner and click Continue to start the process. Wait until cloning is complete.
FAQs
Can Clonezilla clone a HDD to SSD?
Yes, it can. Clonezilla can provide a complete 1-to-1 copy of an HDD on an SSD. However, Clonezilla can also be used for cloning an SSD to an SSD or an HDD to an HDD.
Clonezilla can also restore drives and perform several other disk-copying tasks. For example, you can utilize many remote server options, compression features, backup scheduling, disaster recovery, secure storage, and other functionalities.
What are the Clonezilla HDD cloning limitations?
Clonezilla doesn’t have a graphic user interface, and you have to access the tools through BIOS. You also need to create a bootable media with Clonezilla on it before you can start using it, which can be complicated for some.
On the other hand, Clonezilla doesn’t let you clone to a smaller partition than the source drive. In other words, your SSD must be equal to or larger than the HDD you’re cloning. If not, you won’t be able to complete the process.
Is there a simpler alternative to Clonezilla for cloning HDD to SSD?
There are many alternatives to Clonezilla. However, the simplest and most effective option is Wondershare UBackit. This is a comprehensive disk-backup tool that offers cloning functionalities as well. In just four steps, you can start the cloning process without worrying about bootable media, booting options, or the size of your SSD.
Conclusion
Clonezilla is a reliable tool used by many. However, it comes with multiple issues that shouldn’t exist in 2023. That’s why you should consider using one of the simpler alternatives to cloning your HDD quickly and without complications.

