
As an Outlook user, you’ve probably encountered situations where you need to transfer your mailbox data from one device to another or recover lost data from a corrupt or damaged OST file. Fortunately, importing an OST file into Outlook is a straightforward process to help you achieve these goals.
In this article, we’ll show you how to import an OST file into Outlook and introduce some common scenarios for importing an OST file.
OST Files Explained
OST (Offline Storage Table) files are data files by Microsoft Outlook to store a local copy of an individual’s mailbox information. You create OST files when you want to work offline and synchronize your Outlook email, calendar, tasks, and other data with a Microsoft Exchange Server.
The purpose of an OST file is to enable users to access their mailbox data even when they’re not connected to the Exchange server. Once the user reconnects to the server, the OST file synchronizes with the server and updates any changes the user made while offline.
It’s safe to say OST files are essential to Outlook’s offline mode, enabling users to access their emails and other data even when no network connection is available. As such, it’s crucial to understand how to import an OST file into Outlook 365.
You may also be interested in: how to backup OST file

Wondershare UBackit - Your Reliable Email Backup Tool
Back up emails to local hard drives or external storage devices effectively, safely, and completely.
Provide automatic backup to back up your email files daily, weekly, monthly, or non-stop.
Set a password to protect your backups, keeping your data confidential should it be stolen, lost, or compromised.
Support incremental backup, which saves only the changes made to your files since the last backup, reducing backup time and saving storage space.
Reasons You Might Need to Import OST Files Into Outlook
Before we jump straight into it, you might wonder why you need to import OST to Outlook 365 in the first place. There are several reasons one might need to import OST files into Outlook.
- Switching computers or Outlook versions
One common scenario is when a user needs to switch to a new computer or a new version of Outlook, and they want to transfer their mailbox data from the old OST file to the latest installation of Outlook. In some cases, the OST file may become corrupt or damaged, and importing it into a new Outlook profile can be a way to recover the mailbox data.
- Accessing the mailbox from a different device
Another reason could be if a user wants to access their mailbox data on a different device, such as a laptop or tablet, and must migrate OST to Office 365. Since more and more people switch between multiple devices, knowing you can access your mailbox from any device can be helpful.
- Accidentally deleting mailbox data
Additionally, if a user has accidentally deleted their mailbox data, importing the OST file into Outlook can be a way to recover lost data. If you’ve ever unintentionally deleted something from your mailbox, you’ve probably looked for a solution to recover the lost files. Look no further because adding an OST file to Outlook can solve the issue.
Locating Your OST File Before Importing It Into Outlook
Before you import OST to Outlook 2019 or any other Outlook version, you need to know the Outlook OST file location. To do that, you can follow the steps below.
- Open the Outlook app, click the File tab, and navigate to Account Settings.
- Click Account Settings Once there, click the Select your email account option from the list and hit the Change button. That is when you’ll have the Change Account window opened.
- Click the More Settings In the Microsoft Exchange window, click the Advanced tab. Under the Offline Folder File Settings section, you will see your OST file’s path and name.

Alternatively, you can search for the OST file on your computer by following the steps below.
- Open the Windows File Explorer. Click the View tab and select Options from the drop-down menu.
- In the Folder Options window, click the View Under the Advanced settings section, check the Show hidden files, folders, and drives option.
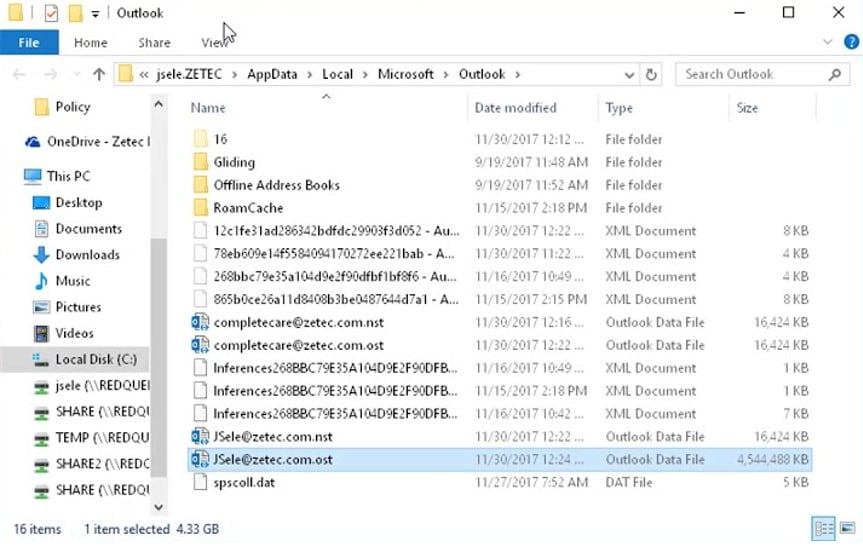
- Look for the file with the .ost extension, which represents your OST file, by navigating to the following path: C:\Users%username%\AppData\Local\Microsoft\Outlook. Once you have located your OST file, you can then use it to import your mailbox data into Outlook.
Theree Methods for Importing OST File to Outlook
There’s no single best way to import OST files into Outlook. Instead, you can choose from several different methods, all equally effective. Let’s check them out in greater detail.
Method 1: Import OST File Into Outlook With the Archive Feature
Step1 Go to the settings
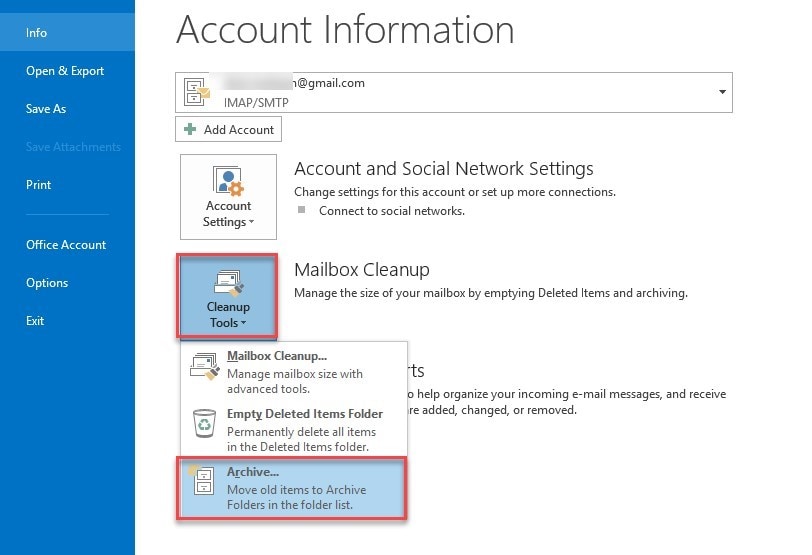
Open Outlook and click on the File tab. Navigate to Options found on the left pane. Select the Advanced option and click on Auto Archive Settings.
Step2 Select the archive settings
Here, you can set up the auto archive settings according to your preference. Once you do that, click OK, and Outlook will create an archive of OST emails for you.
Step3 Open the archived data in Outlook
All that’s left to do is open the archived file in your Outlook, and that’s it.
Method 2: Import OST File Into Outlook Manually
Another excellent method for importing OST files to Outlook is to import and export the files manually. While this method comes with more steps, it’s a seamless way to achieve the desired outcome, especially if you want to import OST file to Outlook 2019.
Step1 Export the desired file
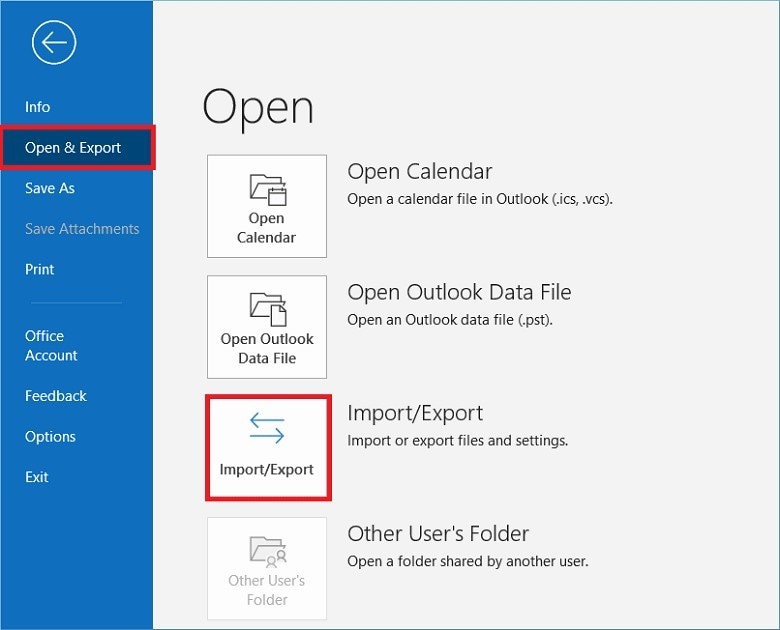
First, open Outlook and click the File tab. Then, click Open & Export and select the Import/Export option. Then, select Export to a file and hit Next. Select Outlook Data File and confirm by clicking Next. From there, you can choose the folder you want to export. Specify the location and name for the exported file and click Finish.
Step2 Import the desired file
To import the OST file to Outlook 2019 or any other Outlook version, click the File tab, click Open & Export, and then select Import/Export. Select the Import from another program or file option and click Next. Select Outlook Data File and hit Next. Choose the file to import and select the desired options. Finally, select the destination folder and click Finish.
Method 3: Using a Third-party Tool
You can also use a third-party tool to import an OST file into Outlook. If you don’t know of a reliable third-party tool, KernelApps is an outstanding solution that’ll make every task simple and quick. Here’s a quick guide for using KernelApps.
Step1 Download and install
Find the Kernel OST to PST Converter on the KernelApps website, download it, and install it on your device.
Step2 Select the OST file
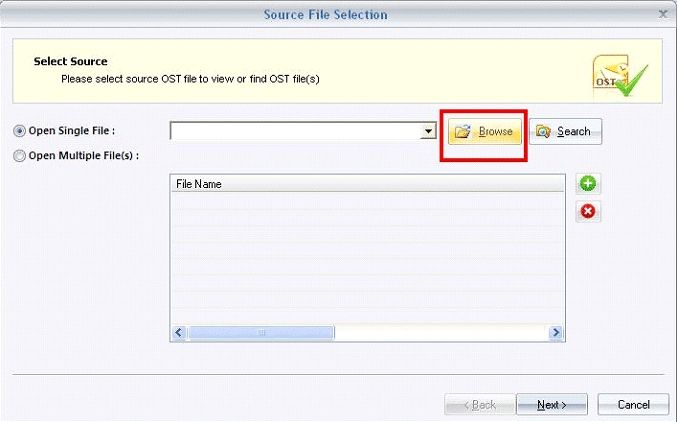
Launch the software and click on the 'Browse' button to select the OST file you want to import into Outlook. After selecting the OST file, click on the 'Next' button to proceed to the next step.
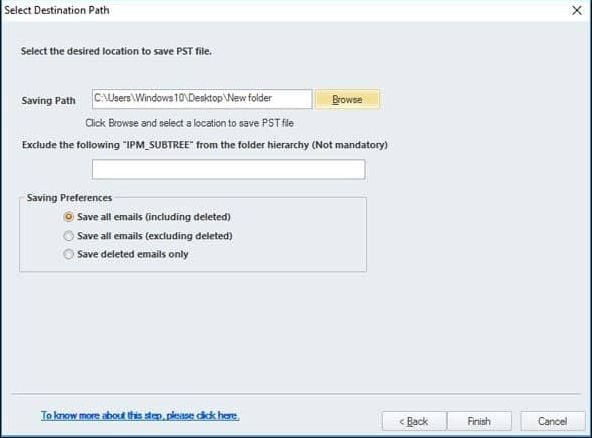
Step3 Choose the output format
In the next step, you can select the output format as PST and choose a location to save the converted PST file. Click on the 'Convert' button to start the conversion process.
Step4 Open the PST file in Outlook
Once the conversion is complete, open Microsoft Outlook and go to the File menu. From the File menu, select Open & Export and then click on Open Outlook Data File. Browse to the location where you saved the converted PST file and select it. Click on the Open button to import the PST file into Outlook.
Conclusion
Importing an OST file into Outlook can be crucial for accessing important mailbox data. You can do it through various methods, including the archive feature, the import/export method, and third-party tools. Each offers its benefits and drawbacks, depending on your needs and preferences.
Regardless of your chosen method, ensuring you have a backup of your OST file is vital to avoid any data loss or corruption.

