

If you're currently in this scenario and wondering how to fix the error message and get your devices up and running again, check out the text below. We'll present all working methods to help you resolve the issue by formatting the problematic drive.
In this article
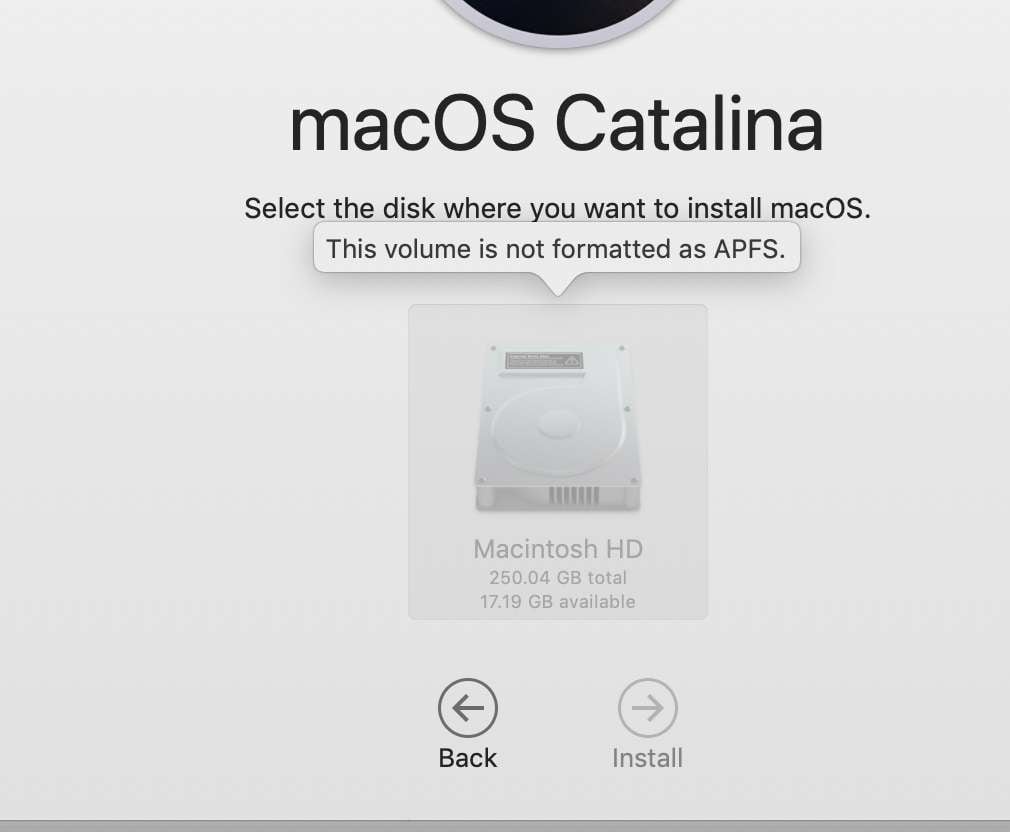
Common Scenarios for the "This Volume Is Not Formatted as APFS" Message
Numerous reasons may lead to the "this volume is not formatted as APFS" message, and we'll name the most common scenarios below.
- 📥File transfers – If you try to transfer files from older macOS versions to macOS 10.13 or later, a message may pop up indicating incompatible file formats.
- 🚀Upgrading to macOS 10.13 or later – If you have been using older macOS versions and want to update your Mac to macOS 10.13 or later, the abovementioned message will appear when you try to make the transition.
- 🔧Unsupported devices – You may be using an external hard drive that is not readable by APFS, leading to the error message.
- 👾Corruption – If the drive is corrupted, a message may pop up to tell you something's wrong with the device.
Delete and Format the Disk to APFS With Disk Utility
The main cause behind the aforementioned error message is formatting, and the best method to resolve the issue is by using Disk Utility on your Mac. As the name suggests, Disk Utility is a program developed for Mac devices that allows you to control and manipulate your storage devices. Using this tool, you can merge, delete, and format your files. In this case, you must delete and format the problematic disk to get it up and running again.
We advise you to follow these steps to ensure a smooth journey and avoid additional problems. Here's a detailed step-by-step guide on how to delete and format the disk to APFS on Mac:
- Head to Applications > Utilities > Disk Utility on your Mac device.
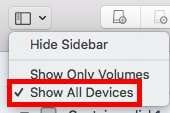
- Once you enter Disk Utility, click Show All Devices, as shown in the image below.
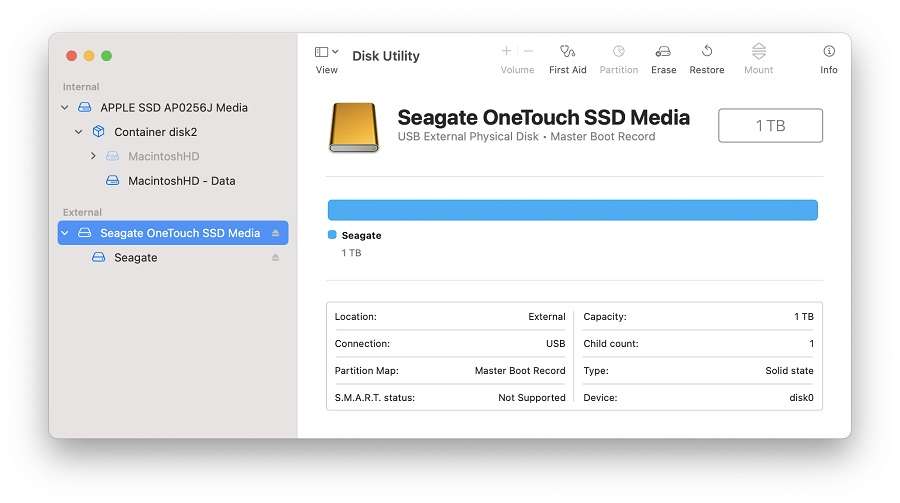
- Tap the problematic drive and click the Erase button from the top bar.
- Rename the drive if needed and select APFS under the Format option. Make sure that the Scheme is GUID Partition Map.
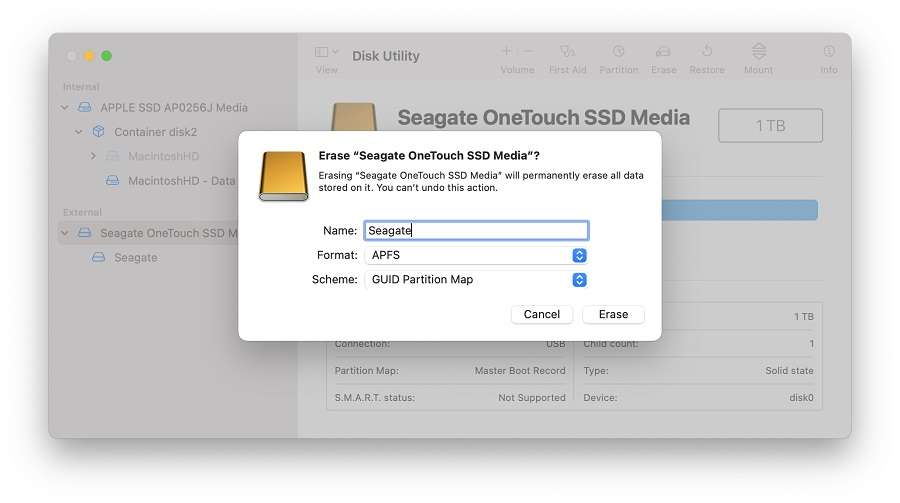
- Click the Erase button again.
Once you finish all these steps, restart your device to apply the changes.
Alternative Formatting Options to APFS
Another way to format your problematic drive on a Mac is by using the Terminal. However, this solution isn't as intuitive as the abovementioned one, so we don't advise using it if you're a beginner or if you don't want to cause more issues. Terminal doesn't have a graphical user interface, which makes the formatting process ten times more difficult.
If you follow the guide we'll present below, you should have no issues with the formatting process. Without further ado, let's check the steps:
- Open Terminal on your device.

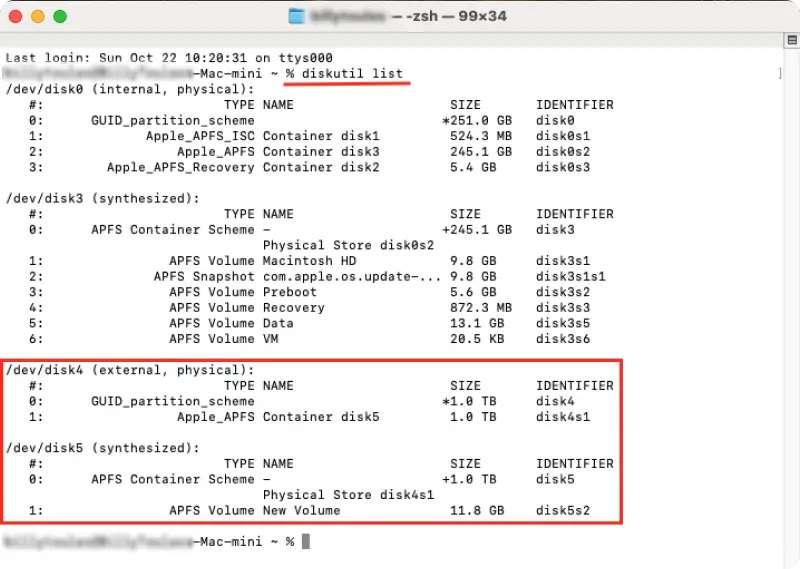
- Enter the diskutil list command and press Return. Identify the problematic drive from the list and remember its name.
- Type the
diskutil unmountDisk /dev /disk.command and press Return. You should replace theXwith the number of your drive.
- After this, type the
diskutil eraseDisk APFS MyDrive /dev/disk Xcommand and press Return. You should also replaceXwith the number of your drive here.
Once you complete these steps, your drive should be formatted. We advise you to restart your device for the best experience.
Recover the Data From APFS Drive While Fixing "This Volume Is Not Formatted as APFS"
Since the solutions mentioned will surely lead to data loss, we advise you to turn to advanced recovery systems to regain your valuables. Formatting will wipe away all the content on your disk, so taking this step is crucial for preserving your data.
We advise you to use third-party software solutions to perform the action. The best and most powerful tool you can use is Wondershare Recoverit, which uses the most powerful retrieval mechanisms on the market. The tool has been around for over 20 years and owns 35 patented technologies, proving its trustworthiness and reliability.
With a success rate of 95%, the tool supports numerous file systems, like exFAT, FAT32, APFS, and many more, so you won't have to worry about the recovery journey.
Once you finish the installation, follow the steps below to learn how to make a successful recovery:
- Open Wondershare Recoverit on your Mac device and click on the Hard Drives and Locations option.
- Next, select the drive from which you want to get data.

- When you select the drive, the program will start scanning for files. You can track the progress and stop the process in this window.

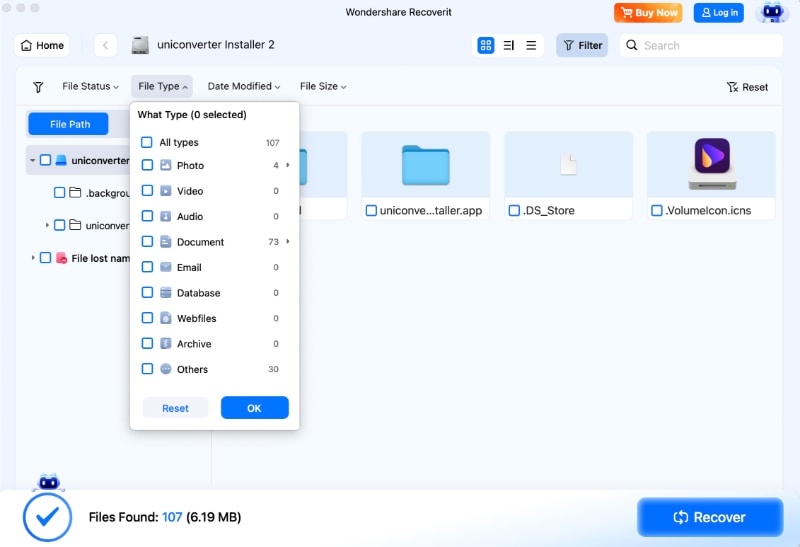
- You can also filter your files by their names, type, and size for easier access.
- Once the program finishes scanning, preview the recovered files and select which ones to save. Click the Recover button.

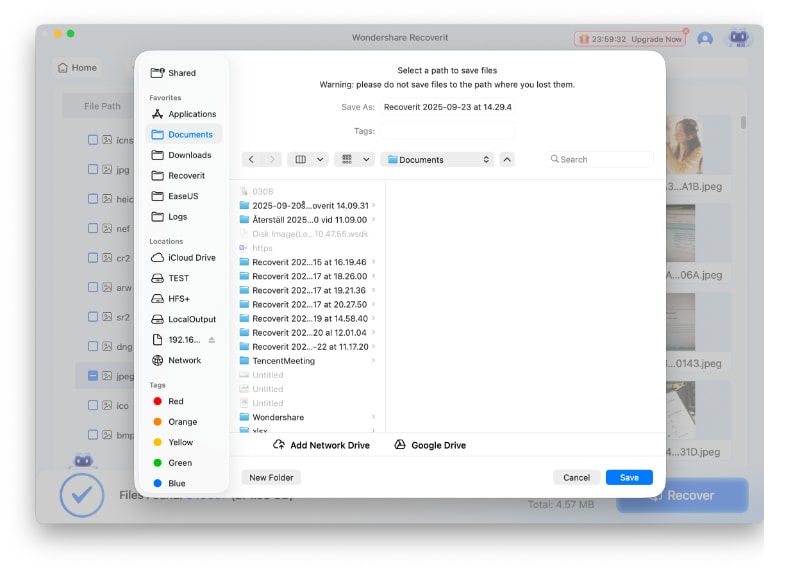
- Choose where to save the files.
After you finish the recovery process, double-check all recovered files and ensure everything you want to save is in a safe location. Then, you can fix your drive by following the instructions we'll discuss below.
Conclusion
If you've recently encountered the " this volume is not formatted as APFS" message on your device, we're here to save the day.
We've presented step-by-step guides on how to resolve this issue using formatting processes. Additionally, it's crucial to recover and back up your data to ensure you won't lose your valuables in the repair process. We advise you to use Wondershare Recoverit for this step.
Try Wondershare Recoverit to Recover the Data From APFS Drive
 Security Verified. Over 7,302,189 people have downloaded it.
FAQ
Which macOS can read APFS drives?
APFS is a relatively new addition to the Mac world. It emerged in 2017, and all devices made that year (and later) support the APFS format. If you have macOS High Sierra (10.13) or later, you can use your device to read, create, and format such drives.Should I use APFS?
That depends on your needs and preferences. If you plan to share your content or use other formats on your device, there may be better solutions than APFS. However, if you don't intend to change your Mac, APFS can benefit you by providing a smoother file-storing experience.How do I convert to APFS?
You can convert to APFS by formatting your existing drive. We advise you to recover your data using Wondershare Recoverit before taking any formatting steps. Then, you can use Disk Utility to format your drive, as presented below:
1. Open Disk Utility on your device.
2. Click on the drive you want to format and select Erase from the top bar.
3. Select the APFS format in the next window and click Erase.How do I change my Mac from APFS to NTFS?
The best way to change your Mac from APFS to NTFS is by using Disk Utility. It's intuitive, and you can follow these steps to ensure the best experience:
1. Open Disk Utility on your device.
2. Click on the drive you want to format and select Erase from the top bar.
3. Select the NTFS format in the next window and click Erase.


