

 TL;DR:
To safely create a bootable SD card for running a new operating system, use an 8GB or larger card and choose either the built-in Windows Disc Image Burner for an automated process or Rufus to configure UEFI-based systems.
● Windows Disc Image Burner is best for non-technical users because it requires no extra downloads and automates the burning process, whereas Rufus is designed for complex setups requiring manual selection of partition schemes (MBR or GPT) and file systems (FAT32 or NTFS).
● The target SD card will be completely erased during the creation process and requires a minimum capacity of 8GB, a compatible card reader, and the specific operating system ISO file.
● Verify the downloaded operating system ISO file integrity using MD5 or SHA-256 checksums before burning to prevent corruption and installation failures.
Ask AI for a summary
 ChatGPT
 Perplexity
 Gemini
 Claude
 Grok
Grok
Do you need to install or run an operating system on your computer using an SD card? You might want to create a bootable SD card. A bootable SD card is a handy tool for this purpose. It allows you to start up your computer with a new or different operating system.
In this article, we'll explain what a bootable SD card is, how it differs from a regular SD card, and how to create bootable SD card. Additionally, we'll cover how to recover data from an SD card and best practices to keep in mind.
In this article

Part 1: What is a Bootable SD Card?
A bootable SD card is an SD card that contains an operating system and can start a computer. Unlike a regular SD card, which is used for storing files and data, a bootable micro SD card has special files that make it possible to boot a computer from it.
Differences between a Bootable SD Card and a Regular SD Card:
| Feature | Bootable SD Card | Regular SD Card |
| Contains OS Files | Yes | No |
| Bootable | Yes | No |
| Use | To start a computer with an OS | To store and transfer files |
| Special Formatting | Requires specific formatting and setup | Standard formatting for file storage |
Part 2: Getting Started: What You Need To Create Bootable SD Card
Preparing to create a bootable SD card requires gathering a few essential items and making sure everything is in place for a smooth process. Here’s what you need:
- A Computer: You’ll need a computer to format and set up the SD card. This is where you’ll download the necessary files and use the formatting software.
- An SD Card: Choose an SD card with at least 8GB of storage space or more. This ensures you have enough space for the operating system and any additional files.
- SD Card Reader: An SD card reader is necessary to connect your SD card to your computer. Some computers have built-in readers, but if yours doesn’t, an external USB reader will work fine.
- Operating System ISO File: Download the ISO file for the operating system you want to install, such as Windows 10 or another version. This file contains all the data needed to install the OS.
- SD Card Formatting Software: Use reliable tools like Rufus or Balena Etcher to format the SD card and create the bootable setup. These programs simplify the process and ensure everything is configured correctly.
- Backup Storage: Before you start, back up any important data from the SD card to avoid losing it during the formatting process.
- Stable Internet Connection: Ensure you have a reliable internet connection to download the necessary files without interruptions.
- Power Supply: Make sure your computer is plugged in or has enough battery life to complete the download and formatting process without power interruptions.
By preparing these items in advance, you’ll be well-equipped to create a bootable SD card and ensure the process goes smoothly. This preparation helps avoid common issues and ensures you have everything you need to get started.
Part 3: How to Create Bootable SD card
Need to install an operating system using an SD card? Making a bootable SD card can help you run or install a new OS on your computer easily. Here's how to get started.
Method 1: Use the Windows Disc Image Burner Tool
The Windows Disc Image Burner tool is built into Windows and is incredibly user-friendly. Since it is already part of the Windows operating system, you don't need to download any additional software. This tool is designed to create bootable media from ISO files and is ideal for users who prefer a straightforward approach. It automates much of the process, reducing the risk of user error, and ensures that the ISO file is correctly written to the SD card, making it bootable without any extra steps.
This method is particularly beneficial for those who are not very tech-savvy but still need a reliable way to create a bootable SD card.
Steps:
Step 1: Connect the SD card to PC. Right-click the ISO file. Select "Burn disc image".
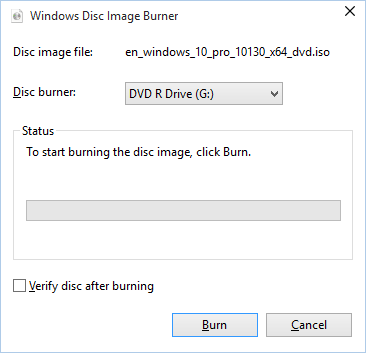
Step 2: In the Windows Disc Image Burner window, select your SD card from the list. Click "Burn" to start creating the bootable SD card.
Wait for the process to complete and safely eject your SD card.
Method 2: Use Rufus (UEFI Based Systems)
Want to create bootable SD card in an easy way? Rufus is a powerful and widely-used tool specifically designed for creating bootable media, and it excels in supporting UEFI-based systems. It offers more customization options compared to the Windows Disc Image Burner, such as selecting the partition scheme (MBR or GPT) and file system (FAT32 or NTFS). This flexibility makes it suitable for more complex setups and ensures compatibility with a wide range of devices.
Rufus is also known for its speed and reliability, making it a preferred choice for tech enthusiasts and professionals who need to create a bootable SD card quickly and efficiently.
Additionally, it provides detailed logs and error messages, which can be invaluable for troubleshooting.
Steps:
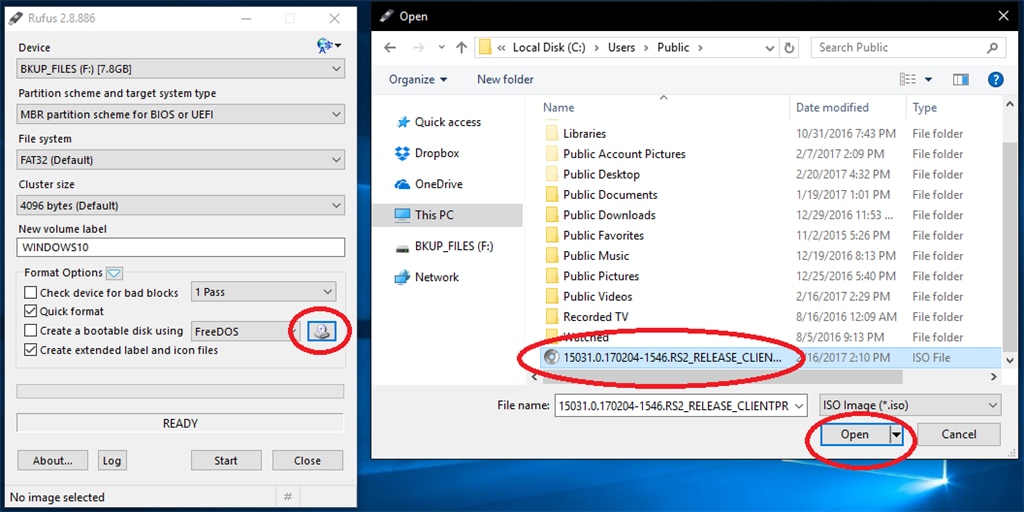
Step 1: Install Rufus from its official website. Use a card reader to connect SD card to PC. Open Rufus and select your SD card from the Device dropdown menu.
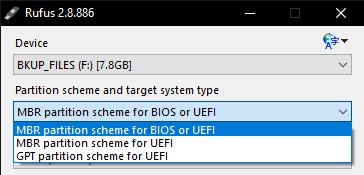
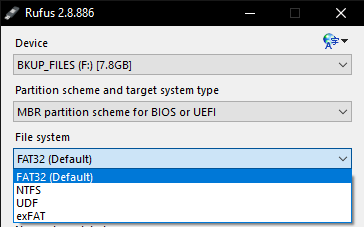
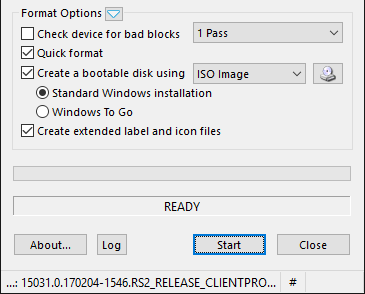
Step 2: Click SELECT and choose the ISO file you want to use. Under Partition scheme, choose GPT if you are using UEFI. Under File system, select FAT32 or NTFS based on your needs. Click START to begin creating the bootable SD card.
Step 3: Click the Choose Disk Image icon, navigate to the location of the ISO file, select it, and then click Open.
Step 4: Click Start to begin copying the files to the thumb drive.
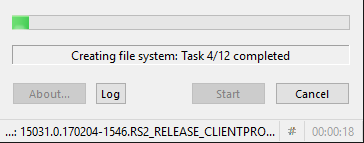
Step 5: Be aware that any files on the thumb drive will be deleted during this process. Wait while the files are being copied to your thumb drive. Once the process is complete, close the window.
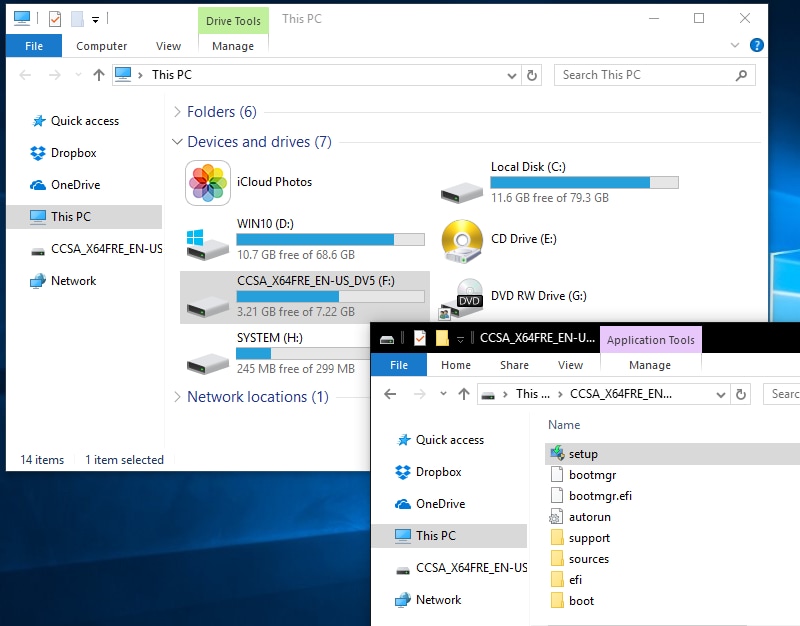
Step 6: And that’s it! Open File Explorer, then launch the setup to begin the installation.
By understanding why these methods are effective, you can choose the one that best fits your needs and ensure the successful creation of your bootable SD card.
Part 4: Recover Data From SD Card In a Few Clicks: Use Recoverit
If you lose data during the process of creating a bootable SD card, Recoverit can help you recover it. This tool is effective in retrieving lost data from formatted, corrupted, or inaccessible SD cards.
Key Features of Recoverit:
- Supports Multiple Formats: Capable of recovering data from various file systems, including NTFS, FAT32, exFAT, and more.
- Deep Scan Technology: Utilizes advanced algorithms to thoroughly scan and recover lost data from your drives.
- User-Friendly Interface: Designed for ease of use, making it accessible even for users with little technical knowledge.
- Preview Functionality: Allows you to preview recoverable files before you proceed with the recovery, ensuring you restore the right data.
- High Recovery Rate: Renowned for its high success rate in data recovery, ensuring the best possible chances of retrieving lost files.
- Wide Compatibility: Compatible with both Windows and macOS, providing flexibility across different systems.
- Quick Recovery Process: Fast and efficient, helping you recover your data in minimal time.
- Secure Data Recovery: Ensures that the recovery process is safe and doesn't cause any further damage to your data or devices.
These features make it a powerful tool for recovering lost data with ease and reliability.
Steps to Recover Lost Data Using Recoverit:
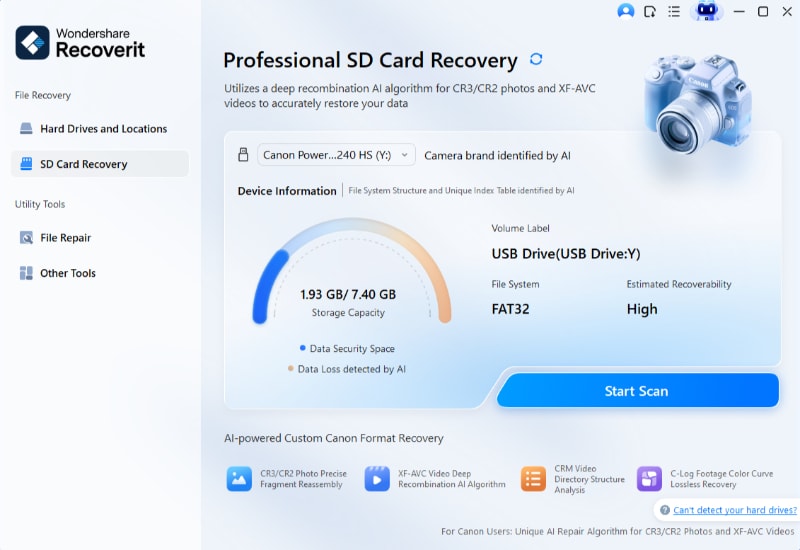
Step 1: Install the Recoverit data recovery tool on your PC. Open Recoverit. Choose your SD card.
Step 2: Click "Scan" to scan.
Step 3: Wait for the process. Let Recoverit scan for lost data.
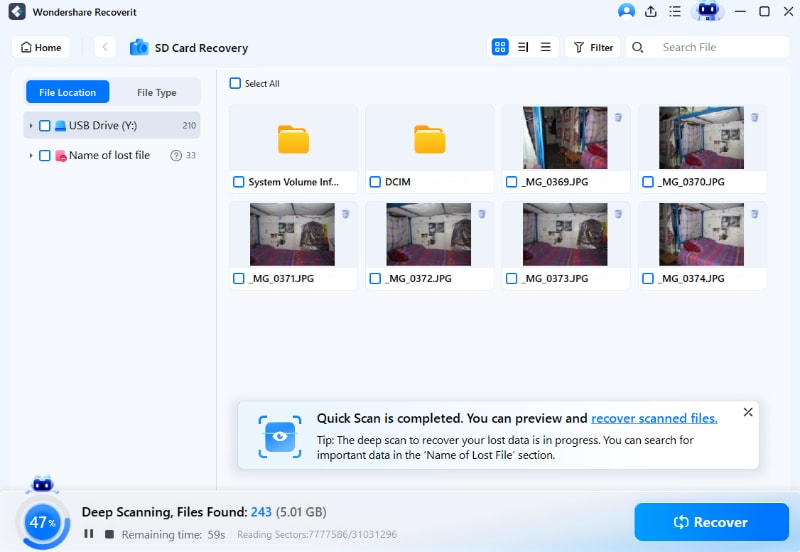
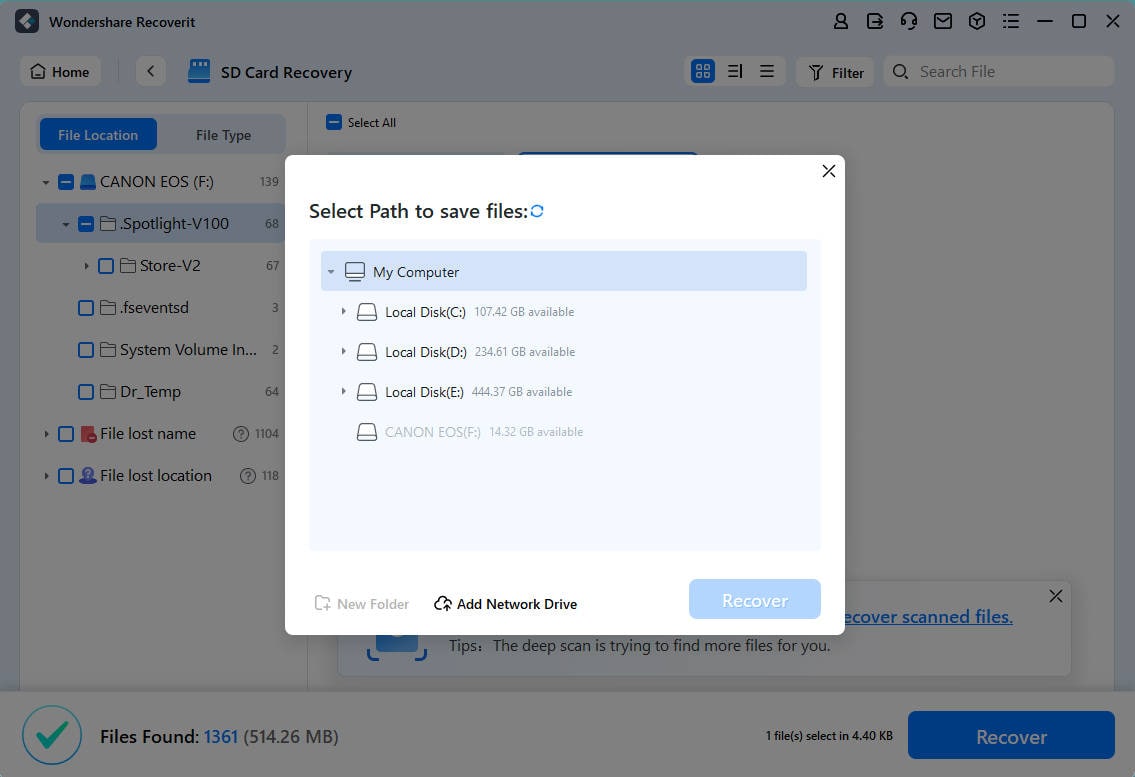
Step 4: Preview the files and click "Recover" to save them.
Learn more >>:
How to Fix Invalid Partition Table?
Why Recoverit is the Leader in SD Card Data Recovery?
Part 5: Best Practices to Create Bootable SD card
Here are some best practices to follow when creating a bootable SD card:
- Use a High-Quality SD Card: Choose a reliable and high-quality SD card to ensure the best performance and longevity. Avoid using old or damaged cards.
- Check Compatibility: Ensure the SD card is compatible with your device and the operating system you plan to install.
- Backup Your Data: Before starting, back up any important data on the SD card to avoid losing it during the formatting and setup process.
- Use Trusted Software: Use reputable software like Rufus to create the bootable SD card. These tools are designed to simplify the process and reduce the risk of errors.
- Verify the ISO File: After downloading the operating system ISO file, verify its integrity using checksums (like MD5 or SHA-256) to ensure it is complete and not corrupted.
- Follow Detailed Instructions: Adhere to the step-by-step instructions provided by the software or guides you are following. This helps avoid mistakes that could render the SD card unusable.
- Test the Bootable SD Card: After creating the bootable SD card, test it on your target device to ensure it works correctly before you rely on it for installations or troubleshooting.
- Keep Your Software Updated: Ensure the SD card formatting software you are using is up-to-date. Software updates often include bug fixes and performance improvements.
- Store the SD Card Properly: Keep the SD card in a safe and dry place when not in use to protect it from physical damage or environmental factors.
By following these best practices, you can create a bootable SD card efficiently and effectively, ensuring a smooth and reliable setup process.
Conclusion
Creating a bootable SD card is a useful skill. Whether you need a Windows bootable SD card or another OS, following the steps in this guide will help. Remember to back up your data, use reliable tools, and test your bootable SD card.
If you lose any data, Recoverit is there to help you recover it quickly. Follow best practices to ensure a smooth and successful process. Happy booting!
Try Wondershare Recoverit to Perform Data Recovery
 Security Verified. Over 7,302,189 people have downloaded it.
FAQ
-
Q1: What is a bootable SD card?
A bootable SD card is an SD card that has an operating system installed on it. This means you can use the SD card to start (boot) your computer, even if the computer doesn’t have an operating system installed on its internal drive. It’s like having a portable version of your computer’s software that you can carry around and use on different devices. -
Q2: How do I create a bootable SD card?
Creating a bootable SD card involves several steps. First, you need a computer, an SD card, an SD card reader, and the ISO file of the operating system you want to install. You also need software like Rufus or Balena Etcher. Here are the steps: Download and install the software on your computer. Insert the SD card into the card reader and connect it to your computer. Open the software and select your SD card from the list. Choose the operating system ISO file. Start the process and wait for it to complete. Safely eject the SD card when done. -
Q3: Can I recover data lost during the creation of a bootable SD card?
Yes, you can recover data lost during the creation of a bootable SD card using a tool like Recoverit. Here’s how: Download and install Recoverit on your computer. Open the program and select "Lost Partition Recovery." Choose your SD card and click "Start" to scan. Let Recoverit scan for lost data. Preview the recoverable files and click "Recover" to save them to a safe location. These steps will help you recover any important files that were lost during the formatting and setup process.


