SD card is now very popular and is used a lot in our daily lives, such as we use SD cards in cameras, drones, phones and other devices. Have you ever tried to access your SD card and saw the SD Card Access Denied error? It can be very annoying and confusing. This error stops you from reaching your important data.
Why does this happen? What causes this error to appear? In this article, we will cover what “SD Card Access Denied” means. We will also cover the causes and fixes for this error in detail.
In this article
Part 1: What Is The Meaning Of "SD Card Access Denied"?
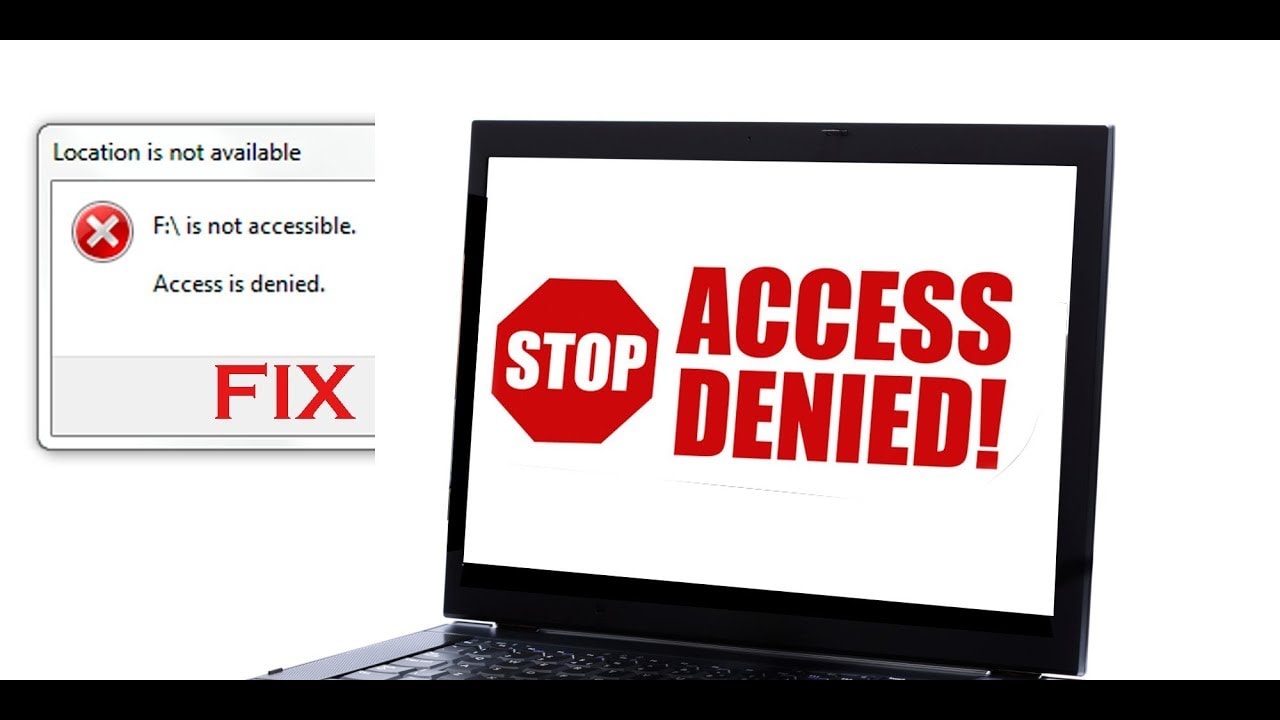
When you see "SD Card Access Denied," it means the card is blocking access. An access denied SD card means the system cannot read or write data. Sometimes, you might see "SD card permission denied." This indicates you lack the necessary permissions.
The error is frustrating because it stops you from accessing your files. The term "SD card access is denied" can refer to hardware or software issues. Knowing the exact meaning helps in troubleshooting the problem more effectively.
Micro SD card access denied errors are not rare. They are common across different devices and situations. Identifying the exact cause can make resolving the issue much easier. This error can occur in cameras, smartphones, and computers.
Part 2: What Causes The SD Card Access Denied Issue?
There are several common causes for the "SD card access denied" issue.
- Physical Damaged SD Card: Physical damage can prevent the SD card from being read.
- There are corrupted files present on the SD card: Corrupted files can block access to the entire card.
- The SD card is write-protected: A write-protected SD card prevents any new data from being added.
- You do not have the necessary permissions to access the card: Lack of permissions can block access to the card.
- The file system of the SD card is unsupported by your device: An unsupported file system can prevent access.
- The SD card is infected by a virus or malware: Viruses can corrupt the SD card and block access.
- The SD card needs to be formatted to be used properly: Formatting issues can prevent access to the SD card.
Part 3: How To Fix The SD Card Access Denied Error
Let’s go through each method in detail. Each fix has a detailed introduction and steps to follow.
Fix 1: Use the Windows Error Checking Tool
The Windows Error Checking Tool is a built-in utility that can scan your SD card for errors. It automatically detects and attempts to fix any issues found. This tool is especially useful if your SD card has file system errors or corruption. By running this tool, you can often resolve problems that prevent access to your SD card.
Using the Windows Error Checking Tool is straightforward and can quickly identify any underlying issues. This helps ensure that your SD card remains functional and accessible.
Follow this:
- Insert the SD card into your computer. Go to This PC or My Computer. Right-click on the SD card. Select Properties.

- Go to the Tools tab. Click Check under Error checking.
Fix 2: Ensure You Have The Necessary Read/Write Permissions
At times, the "SD card access denied" error occurs due to a lack of necessary permissions. Your system might not have the required read/write permissions to access the SD card. This issue can arise if the SD card was previously used on a different device or if the permissions were altered unintentionally.
To fix this, you need to check the permissions settings for your SD card. By right-clicking on the SD card drive, selecting properties, and navigating to the "Security" tab, you can view and modify the permissions. Ensuring you have full control over the SD card can often resolve access issues.
Steps to ensure read/write permissions:
- Insert the SD card into your computer. Right-click on the SD card drive. Select Properties. Go to the Security tab.
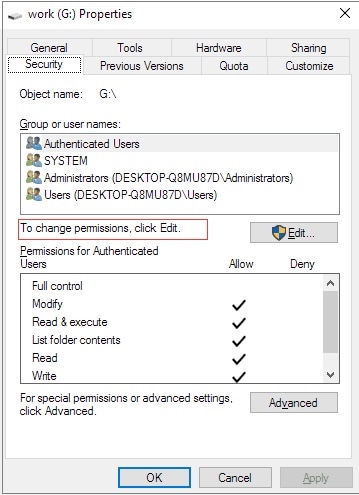
- Check if you have read/write permissions. If not, modify the permissions to grant access.
Fix 3: Run CHKDSK
Chkdsk is another built-in Windows utility that can help fix SD card errors. It stands for "Check Disk" and is designed to identify and repair file system errors and bad sectors on your storage devices. Running Chkdsk on your SD card can help fix issues that are causing the access denied error.
This tool is accessed via the Command Prompt, where you need to enter specific commands to initiate the check. Chkdsk can be particularly effective if the SD card has developed errors over time due to extensive use or improper handling.
Steps to run Chkdsk:
- Insert the SD card into your computer. Open Command Prompt as an administrator. Use this command: chkdsk [SD card drive letter]: /f.

- Press Enter to start the check.
Fix 4: Change Drive Letter
Changing the drive letter of your SD card can sometimes resolve access issues. This fix is useful when there are conflicts with drive letters or when the system fails to recognize the SD card correctly. Assigning a new drive letter can refresh the system's view of the SD card.
This method can help resolve issues where the SD card is not being recognized properly by the system. By changing the drive letter, you can make the SD card accessible again and ensure smooth operation.
Steps to change drive letter to fix SD card access denied:
- Insert the SD card into your computer. Go to Disk Management. Right-click on the SD card drive.

- Select Change Drive Letter and Paths. Click Change and select a new drive letter from the list.
Fix 5: Scan For Viruses/Malware
Viruses or malware can corrupt your SD card and cause it to be inaccessible. Scanning your SD card with reliable antivirus software can help detect and remove any malicious threats. This is an essential step if you suspect that your SD card has been compromised.
By scanning for viruses and malware, you can protect your SD card from further damage and restore its accessibility. This ensures that your data remains safe and the SD card functions properly.
Steps to scan for viruses/malware:
- Insert the SD card into your computer. Use antivirus software to scan the SD card thoroughly.

- Remove any detected threats to make the SD card accessible again.
Fix 6: Format The SD Card
Formatting the SD card is a more drastic solution but can effectively resolve persistent access issues. This process will erase all data on the SD card and create a new file system, eliminating any corruption or errors that were causing the access denied error.
While formatting will result in data loss, it can restore the SD card to a functional state. This fix is useful when other methods fail to resolve the issue. After formatting, the SD card will be as good as new, allowing you to use it without any problems.
Steps to format the SD card:
- Insert the SD card into your computer. Right-click on the SD card drive. Select Format from the menu.

- Choose the file system (e.g., FAT32 or NTFS). Click Start to begin the formatting process.
Part 4: Lost Data After Formatting SD Card? Use Recoverit Today
If you lost data after formatting your SD card, don’t worry. Tools like Recoverit can help retrieve lost files. Recoverit is user-friendly and efficient for data recovery.
Using Recoverit, you can recover various types of files. Whether it’s photos, documents, or videos, Recoverit can bring them back. Always keep such tools handy to avoid data loss.
Recoverit works by scanning your SD card for recoverable data. It then allows you to restore those files to a safe location. This way, you can recover important data without much hassle.
Here are simple steps to use Wondershare Recoverit for data recovery:
- First, click the download link above to download Recoverit and install it on your computer. Insert your SD card into your computer and launch Recoverit. Select the SD card as the location to scan for lost data.
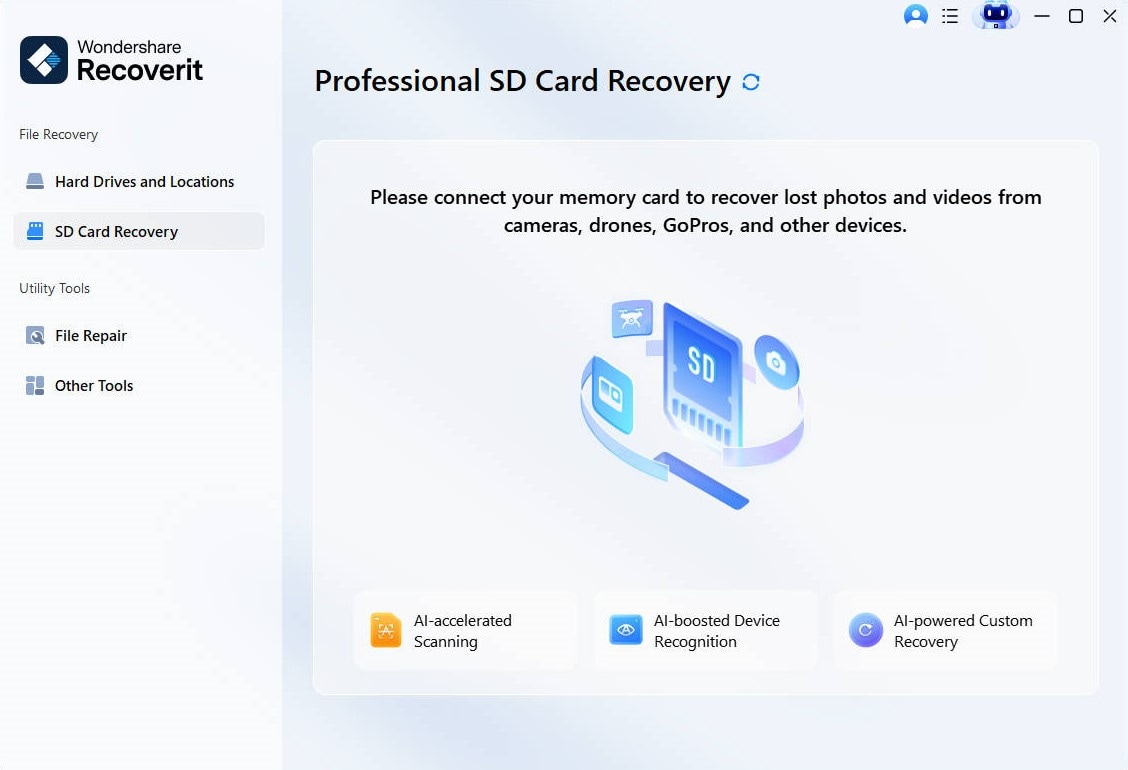
- Click the Scan button.
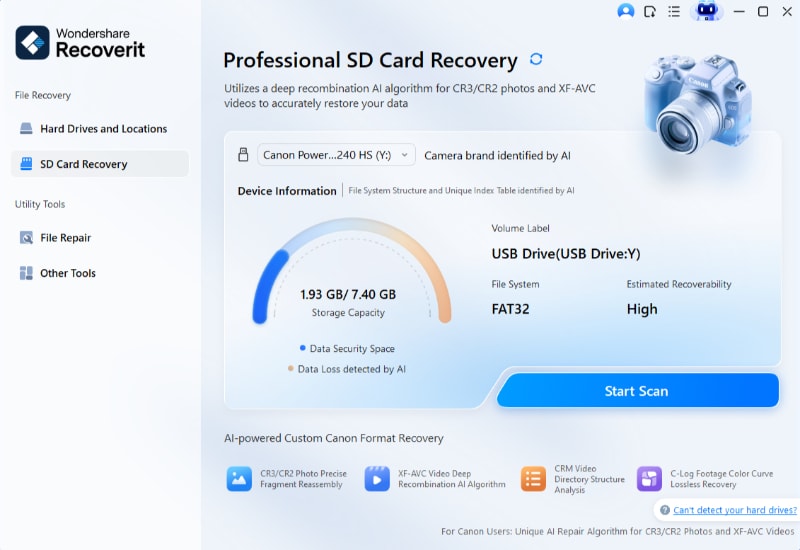
- Recoverit will scan the SD card for recoverable files.
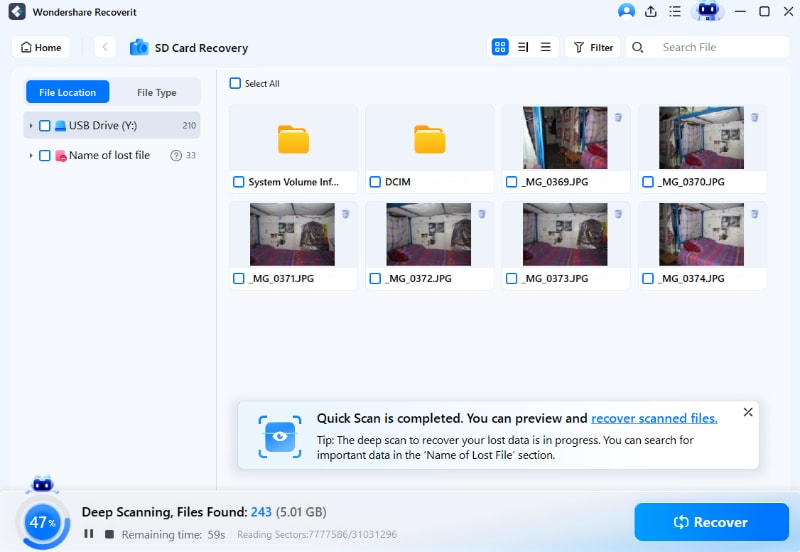
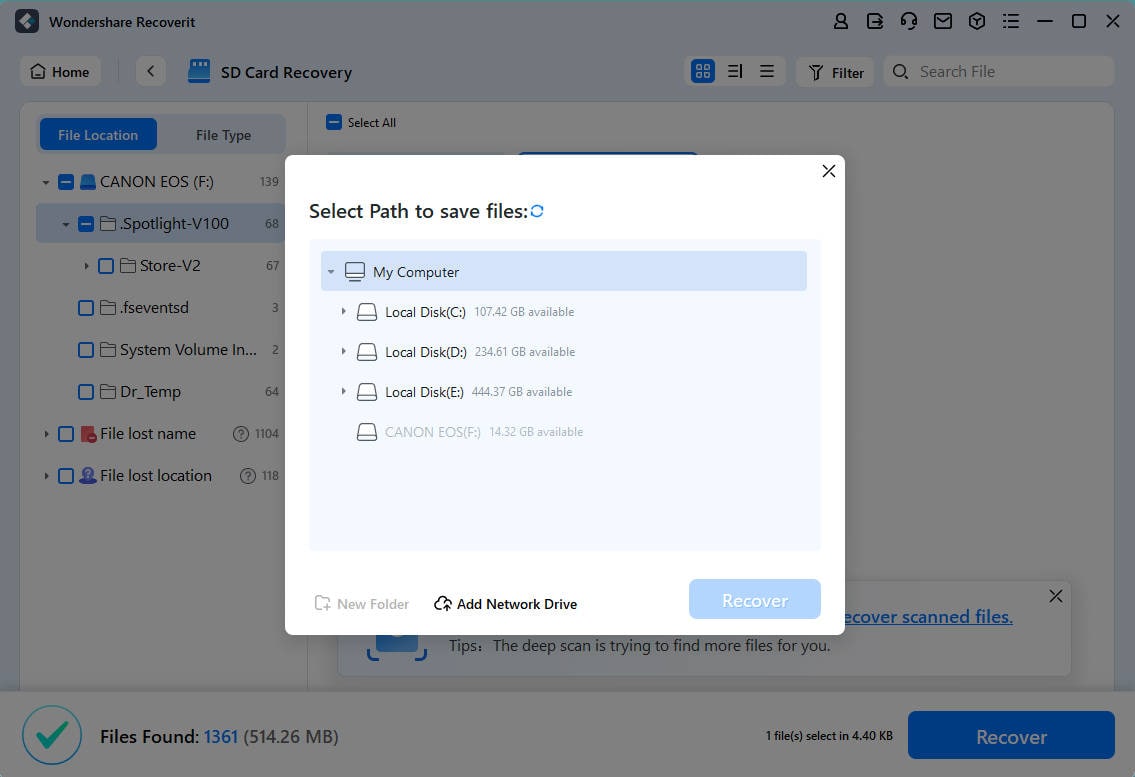
- Once the scan is complete, preview the found files. Select the files you want to recover and click the Recover button to save them to a safe location on your computer.
Related Video >>: How to Fix SD Card Not Detected/Recognized Issue?
Part 5: Tips To Avoid The SD Card Is Inaccessible Problem
Ensuring your SD card remains accessible and functional requires some care and attention. Here are some tips to help you avoid the "SD card is inaccessible" problem:
- Always Safely Eject the SD Card: When removing the SD card from your device, always use the "safely eject" or "remove hardware" option. This helps prevent data corruption.
- Use Antivirus Software Regularly: Scan your SD card with reliable antivirus software to ensure it is free from viruses and malware. This protects your data and keeps the card healthy.
- Keep the SD Card Dry and Safe: Moisture can damage the electronic components of the SD card. Always store your SD card in a dry, cool place, away from direct sunlight and heat.
- Avoid Using the Same SD Card on Multiple Devices: Constantly switching the SD card between different devices can cause compatibility issues and increase the risk of corruption. Use separate SD cards for different devices if possible.
- Backup Important Data Regularly: Make it a habit to backup important data stored on your SD card. Regular backups can save you from data loss in case of unexpected errors or damage.
- Handle the SD Card with Care:Avoid bending, dropping, or exposing the SD card to physical damage. Handle the card gently when inserting and removing it from devices.
- Check the SD Card for Errors Periodically: Use built-in tools to check your SD card for errors and fix them. Regular checks can help identify issues early and prevent data loss.
- Format the SD Card Periodically: If you use the SD card heavily, consider formatting it occasionally. This clears any potential file system issues and keeps the card running smoothly. Remember to backup your data before formatting.
By following these tips, you can keep your SD card in good condition and avoid the frustration of access problems. Regular maintenance and careful handling can extend the life of your SD card and ensure your data remains safe and accessible.
Related Video >>: How to Remove Write Protection from SD Card?
Conclusion
The SD card access denied error is a common issue. But it can be fixed with the right steps. Following these tips can help prevent it in the future. Always remember to handle your SD card with care.
Learning to handle these issues helps you avoid future problems. Stay informed and keep your data safe. SD cards are essential for storing data, so maintaining them well is important. Regular checks and preventive measures can save you from major troubles.
Try Recoverit to Recover Data From SD Card
Security Verified. Over 7,302,189 people have downloaded it.
FAQ
-
Q1: Why is my SD card inaccessible?
Your SD card may be inaccessible due to physical damage, corrupted files, or virus infection. It can also be write-protected or have an unsupported file system. Sometimes, a faulty SD card reader or lack of necessary permissions can cause this issue. Ensuring the SD card is in good condition and compatible with your device can help. -
Q2: Can I recover data from a formatted SD card?
Yes, you can recover data from a formatted SD card using data recovery tools like Recoverit. These tools scan the SD card for recoverable data and allow you to restore lost files. It is important to avoid using the SD card after formatting to increase the chances of successful recovery. Regular backups can also prevent data loss. -
Q3: How do I check if my SD card has a virus?
To check if your SD card has a virus, use reliable antivirus software to scan the card. Insert the SD card into your computer and run a thorough scan with the antivirus program. The software will detect and remove any viruses or malware. Regular scans can keep your SD card safe and prevent future infections. Using updated antivirus software is essential for protection.


 ChatGPT
 Perplexity
 Google AI Mode
 Grok
Grok


